

Introduction
SAP NetWeaver ABAP is the application server running most of SAP’s software. Version 7.4 comes with Gateway and the option to run Fiori on top of it. The installation of a NetWeaver ABAP system is not overly complex for a developer system: basically it is just installing the software. This installation process is composed of three steps:
-
Check the pre-requisites
-
Perform the actual installation
-
Apply a license
After executing all three steps, you have a fully functional SAP NetWeaver ABAP system.
Pre-requisites
To install a SAP system, you need to check first the hard ware requirements. You also need to ensure that a correct user/group is set up. This depends normally on the SID of your SAP system.
Software packages you’ll need
-
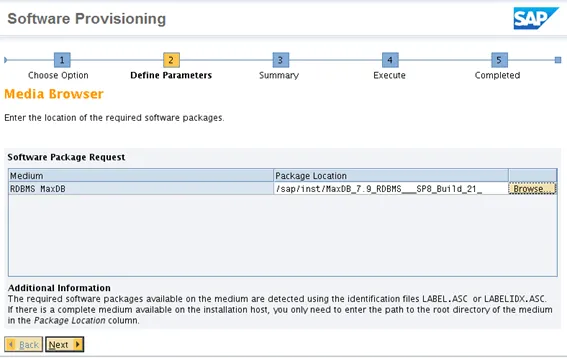
Database: Files to install the underlying database. Here I will use MaxDB.
-
Kernel. The kernel files, depend on your operating system and if you want to use unicode (UC) or not. I’ll use Linux x64 and a UC kernel.
-
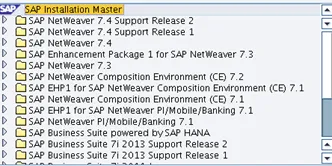
SAP Installer: SWPM. This is the sapinst program. Be careful, as two version of SWPM exist. One is for installing NW AS and products; the other is for installing BS, SolMan and NW 7.0.
With SWPM10SPxx_PL.SAR:
Products based on SAP NetWeaver 7.1x
SAP Composition Environment 7.1x
SAP Composition Environment 7.2
Products based on SAP NetWeaver 7.3x
Products based on SAP NetWeaver 7.4 SR1*, SR2
With 70SWPM10SPxx_PL.SAR:
SAP NetWeaver 7.0, including Enhancement Package 1, 2, 3
SAP Business Suite 7i 2011, 2010, 7 SR1, 2005 SR3 based on SAP NetWeaver 7.0, including Enhancement Package 1, 2, and 3
SAP Solution Manager 7.0 including EHP1 SR1
SAP Solution Manager 7.1 SR1
-
Application Server: ABAP
All files are delivered as ZIP, except SWPM. You’ll have to un-SAR this one. Copy all unziped/unsared file to a common location on your server, like /install.
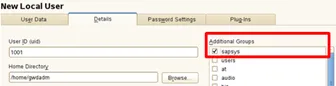
User
For each SAP system you’ll need to have one corresponding administration user. The user ID is determined by the SAP system Id (SID). The user id follows the schema:
User
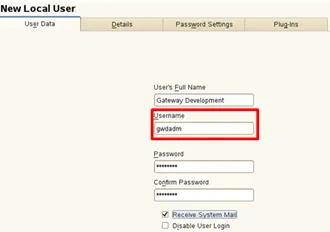
Group
Installation
To start the installation, just run sapinst from the SWPM package.
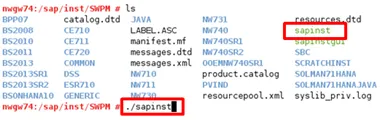
There are two executables: sapinst and sapinstgui. Sapinst will start the local server and the local GUI, while sapinstgui needs to connect to an already started sapinst server. As long as you do not have to do a remote installation, sapinst is the executable you want to run.
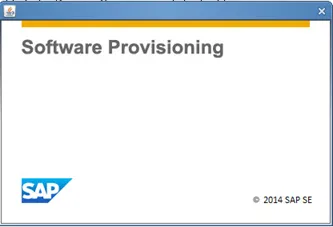
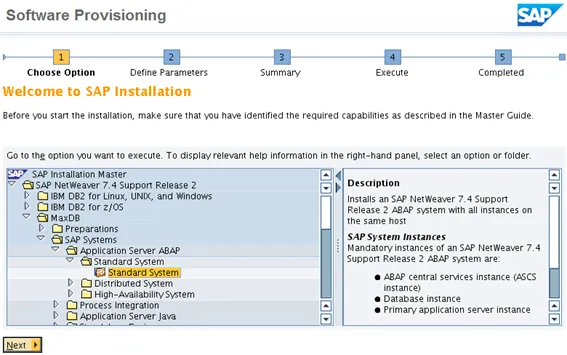
The initial screen shows the install options
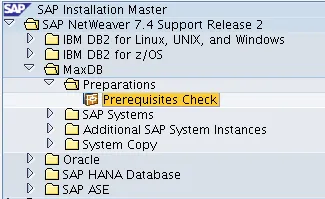
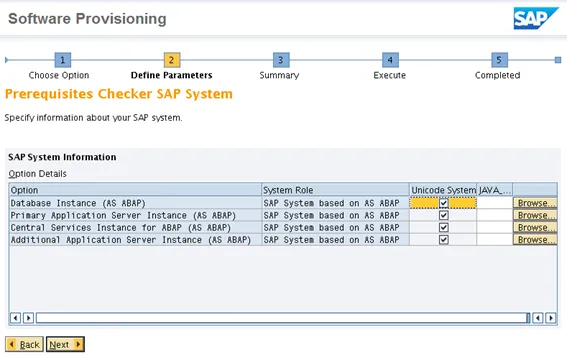
Pre-requisites check
I am going to install SAP NetWeaver 7.4 Support Release 2 ABAP for MaxDB. First thing to run is the preparations step.
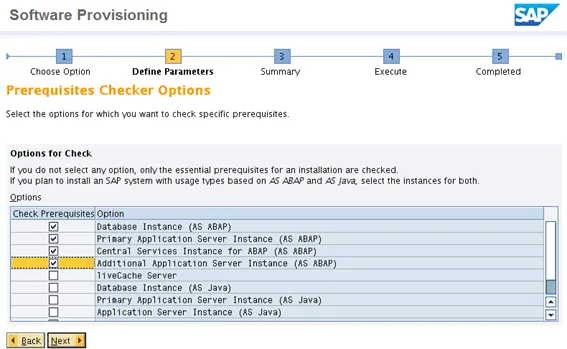
Select what sapinst should test. If nothing is selected, sapinst will check a basic set of requirements. This does not mean that after the check is done your system really meets all the requirements. So make sure you select what you are going to install to have a meaningful test result. As I am going to install NetWeaver ABAP, I selected the ABAP related checks.
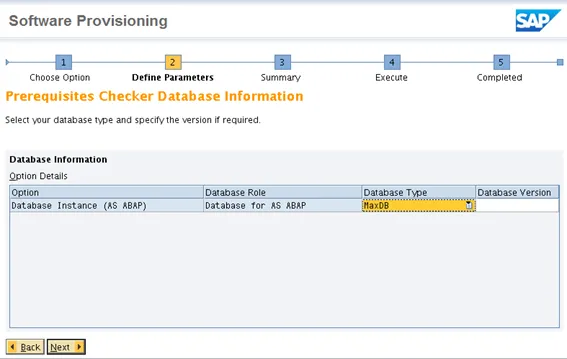
Provide the database type.
Confirm that a UC system will be installed.
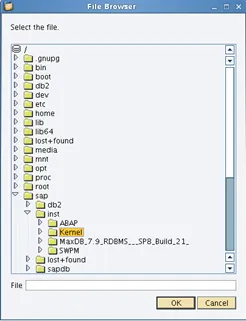
SAPinst will ask for the location of the Kernel files.
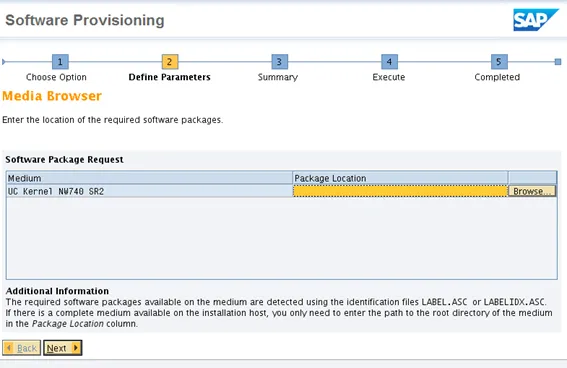
Inform the location of the files. In my case, they are located at /sap/inst

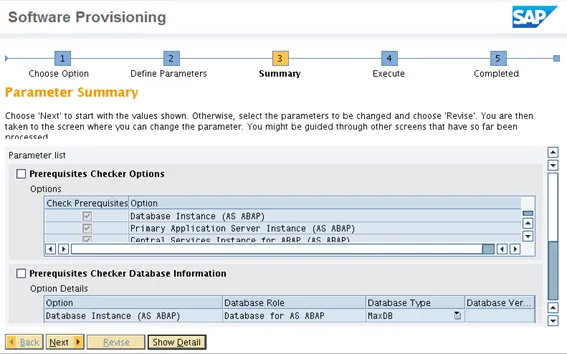
Confirm the prerequisites data. If everything is OK, you can start the process.
The requisites are being verified.
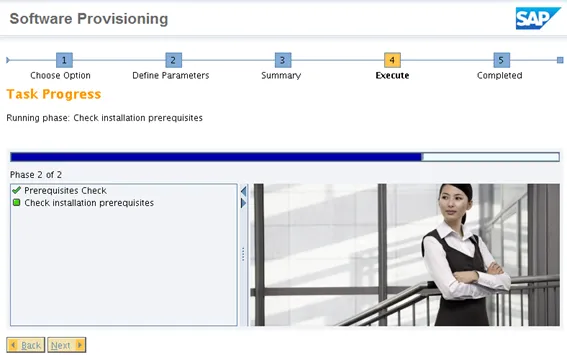
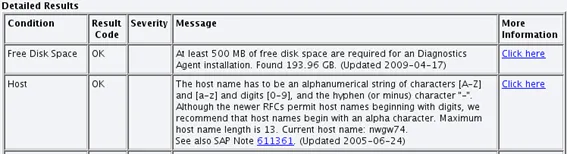
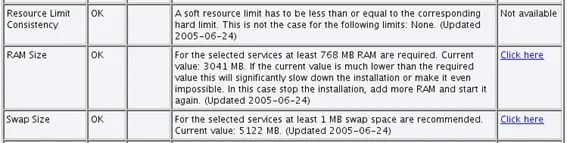
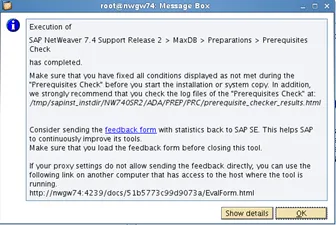
After the check is done, sapinst presents you a screen with the results.
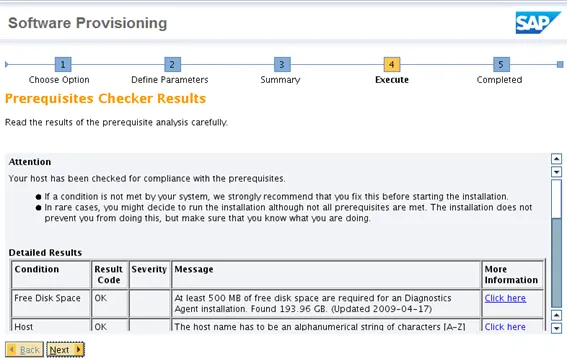
Go through the list. Everything needs to be OK.

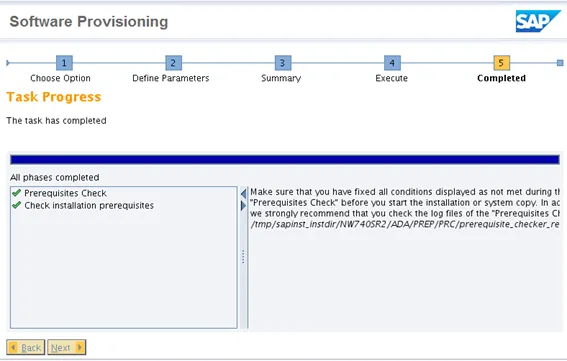
The final dialog confirms that everything is OK and that a report was saved to a local file.
Now we are good to go: sapinst checked the system and gave it a quality stamp. Nothing impedes the installation of NetWeaver ABAP 7.4 SR2 with MaxDB.
Installation
The NW ABAP 7.4 SR2 system is going to be a standalone system, with everything on the same host.
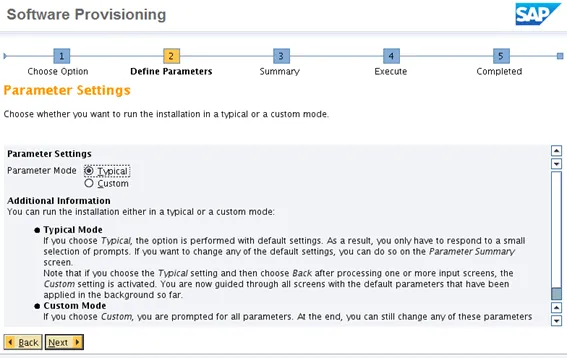
Installation type
Installation mode
Chose mode. Typical is enough, you’ll see still more than enough input dialogs.
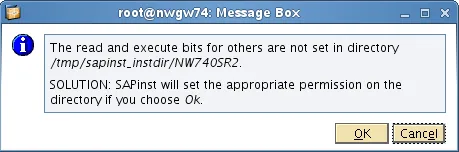
In case the mode of the files is not correct, do not worry. Sapinst will take care of that (thank you sapinst!).
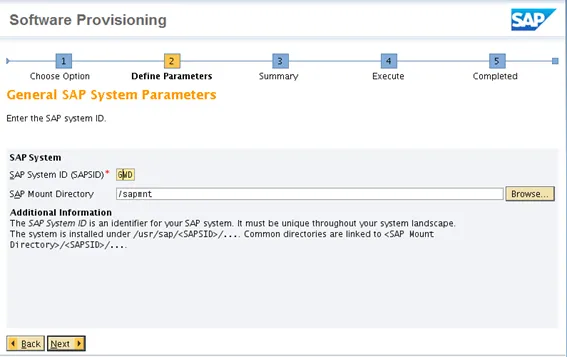
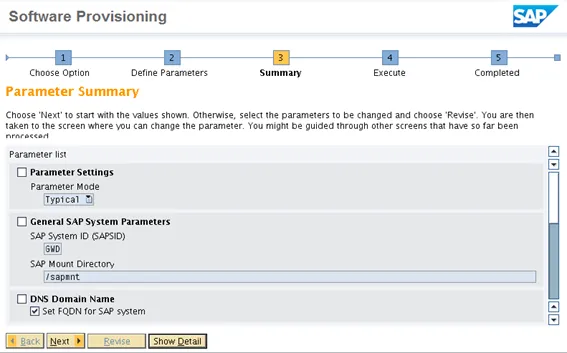
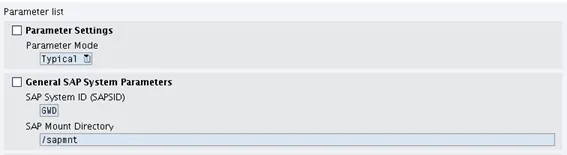
SAP system id
Specify the SID (here: GWD) and the mount directory (here: /sapmnt).
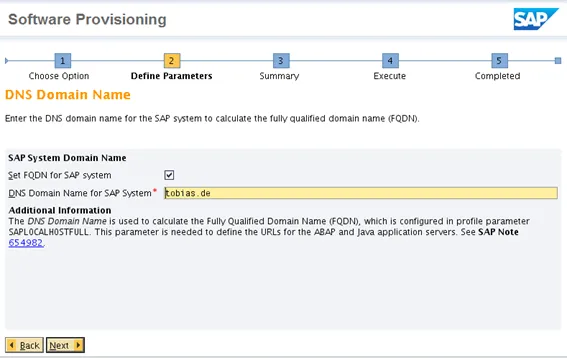
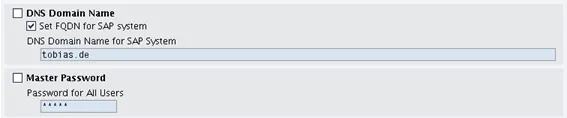
Set DNS name
The 2nd input field is to set the domain name of the server. Do not enter the FQDN or the name of the server here, just the DNS name (here: tobias.de). If you server is nwgw74.tobias.de, only the tobias.de part.
Kernel files

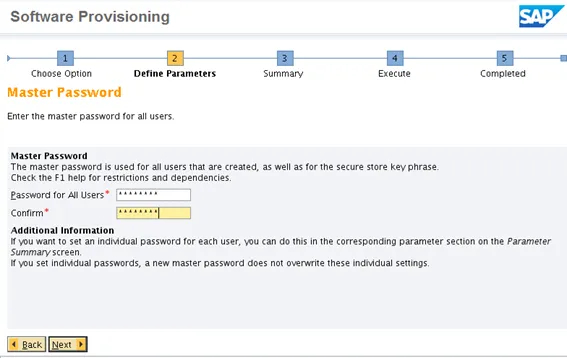
Standard password for all users
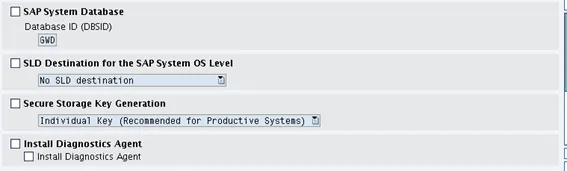
Database SID

DB files
Inform where the DB files are located
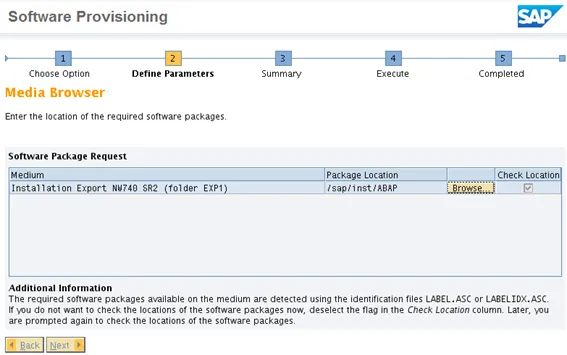
ABAP files
Inform location of ABAP files
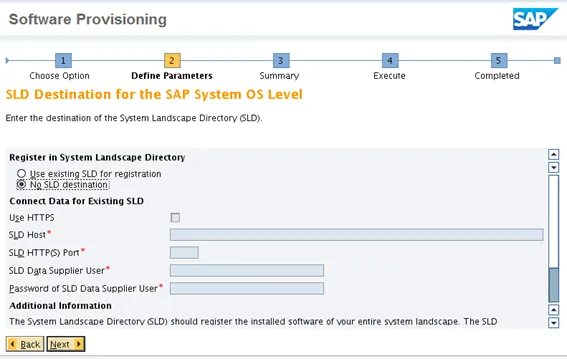
SLD
Let’s do not add the system to a SLD
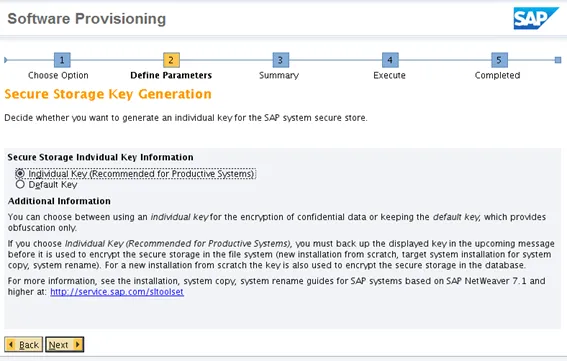
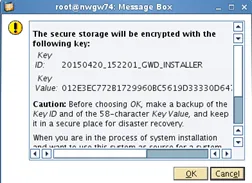
Secure Storage Key Generation
Let the installer create a secure key
Review parameters
Start installation
Lean back and relax, this will take a while
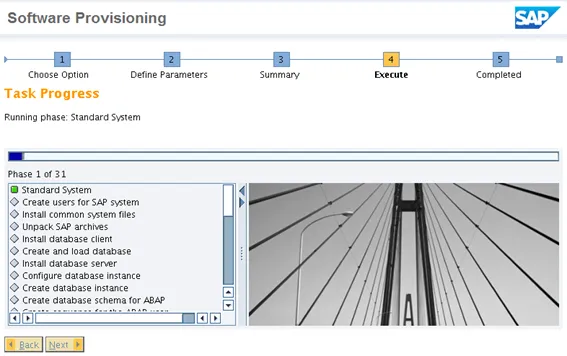
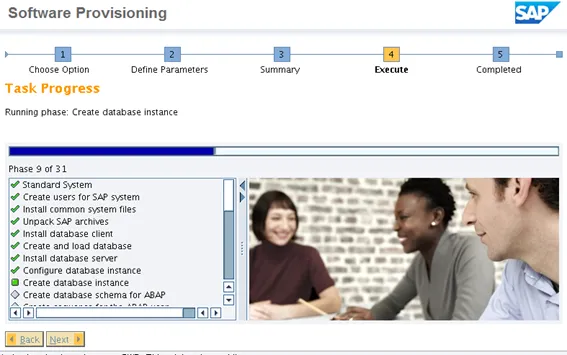
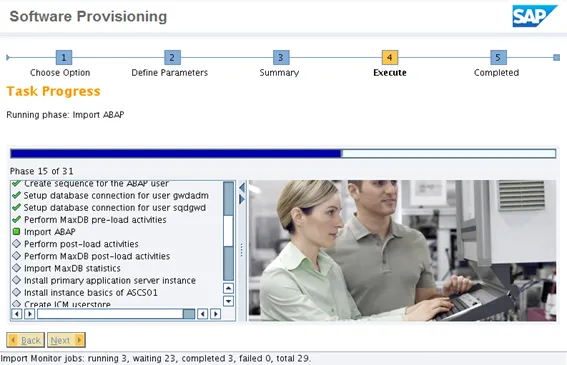
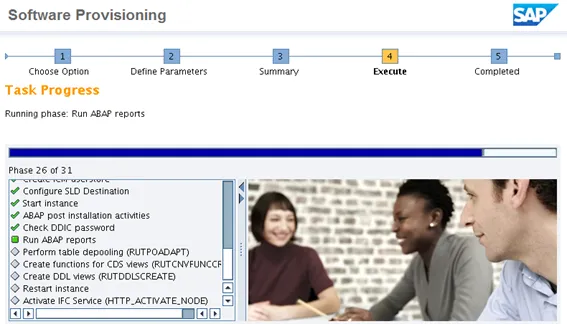
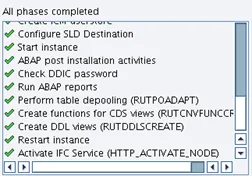
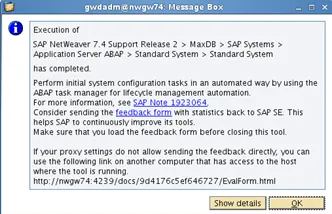
End of installation
After all steps are executed successfully and marked with a green check, the installation is done.
Install SAP license
Log on to the new SAP system is done via SAPGui. User is SAP* and the password is the standard password given during installation.
Transaction: slicense
Automatically, a temporary license is installed.
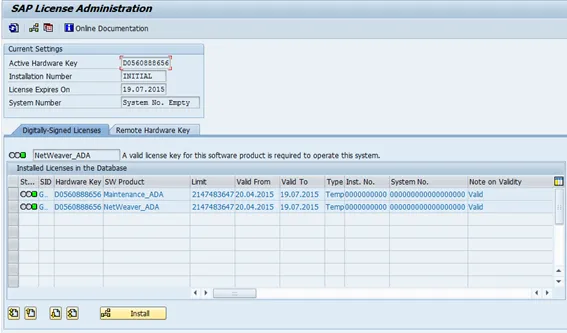
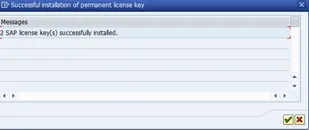
Click the install button and select the license file. If everything is OK, a popup will confirm the installation of the license(s).
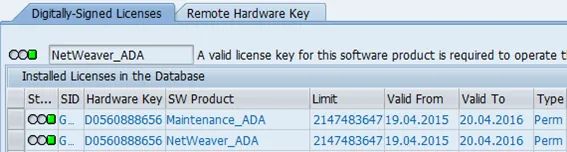
Last check is to verify that the new license is installed and active.
Problems
If the installation goes through without any error: congratulations. Many users will run into some errors, just do a search on SCN for installation problems. Here are some common problems and their solution:
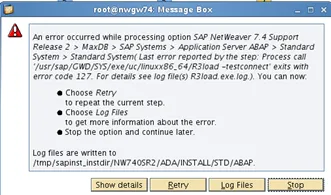
R3load connect error
Step: Import ABAP:
![]()
Problem: R3load –testconnect fails
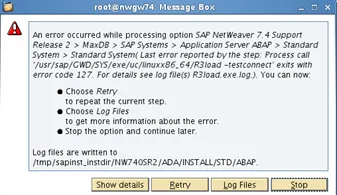
Analysis:
Log file:
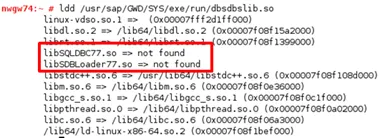
![]()
- File exists in sapdb folder
![]()
Cause: Library not loaded
How to add the MaxDB library to the LD path? Configuration is stored in directory /etc/ld.so.conf
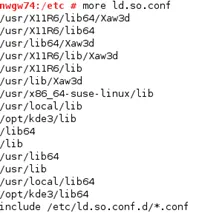
The last line is a include parameter. To add the Max DB libraries, it is just to create a conf file maxdb.conf in /etc/ld.so.conf.d/ and add the lib path to the new file.
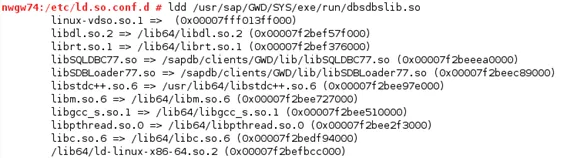
![]()
Running the ld command from above:
Sapinst: retry
Strange errors
SAPinst should be run as the admin user of the instance:
SAPUXUSERCHECK
In case sapinst isn’t capable of setting the right permissions to the file sapuxusercheck, follow SAP Note 1563660 🔗.