Install Oracle Express 11G R2 on CentOS 7

Published by Tobias Hofmann on

1 min read

Preparations

Install some additional packages via yum to ensure that the installation and execution of the database will work. The list may differ, depending on the actual version of CentOS you are using, but the internet gave me back the following packages and you should be on the safe side.

yum update
yum install unzip libaio bc flex

Download

Before using the express edition, make yourself familiar with the license and usage restriction this edition is shipped with. If it still fits your needs, be aware that CentOS is not on the list of officially supported Linux distributions. You are on your own. Download Oracle Express 11G R2 from Oracle. It`s a 308MB file.

The downloaded file is a zipped RPM package; first step is to unzip the file.

unzip oracle-xe-11.2.0-1.0.x86_64.rpm.zip

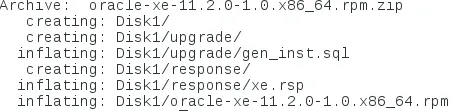
This gives you a new directory called Disk1. This folder contains the installation RPM.

Installation

Go to the folder and install the RPM via rpm tool.

cd Disk1
rpm -ivh oracle-xe-11.2.0-1.0.x86_64.rpm

After the installation, you`ll be prompted to configure the database.

Configuration

Run the tool /etc/init.d/oracle-xe to configure the database.

/etc/init.d/oracle-xe configure

Configure the port

Specify the port of the listener

Inform the system user password. Be sure to note this down somewhere or to really remember it!!!

Specify if you want the database to be started at boot time.

The configuration should now start automatically and only take a few minutes to complete.

The database is install at /u01/app/oracle/product/11.2.0/xe/

The oracle_env script is in the folder bin.

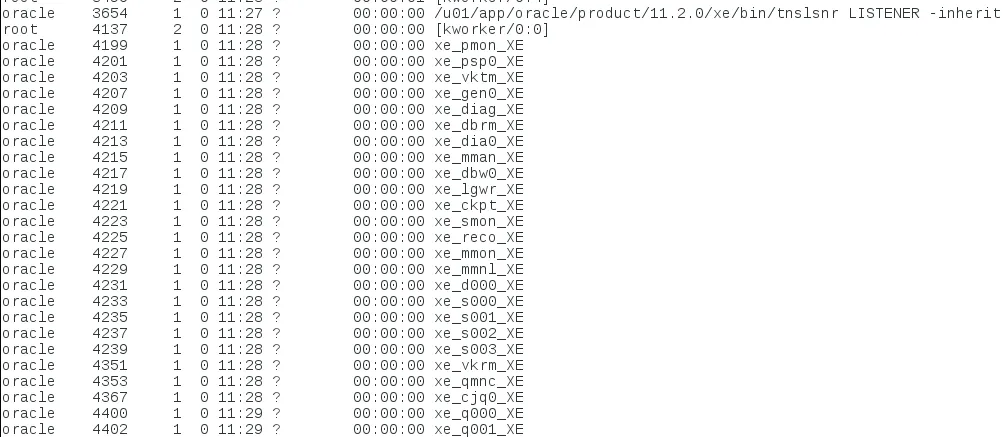
Oracle Express 11G R2 is also started and using ps –ef you can see the processes running.

That`s it, Oracle Express 11G R2 is now installed on CentOS.

Let the world know

Tobias Hofmann

Doing stuff with SAP since 1998. Open, web, UX, cloud. I am not a Basis guy, but very knowledgeable about Basis stuff, as it's the foundation of everything I do (DevOps). Performance is king, and unit tests is something I actually do. Developing HTML5 apps when HTML5 wasn't around. HCP/SCP user since 2012, NetWeaver since 2002, ABAP since 1998.

4 Comments

Jozsef Bencze · February 16, 2018 at 06:58

Dear Tobias Hofmann,

I have a problem.

I’ve done all step, and it is working, but all port is not accesseble remote!!!

netstat:

[root@ip-250 bin]# netstat -plnt
Active Internet connections (only servers)
Proto Recv-Q Send-Q Local Address Foreign Address State PID/Program name
tcp 0 0 0.0.0.0:22 0.0.0.0:* LISTEN 2176/sshd
tcp 0 0 127.0.0.1:25 0.0.0.0:* LISTEN 1230/master
tcp6 0 0 :::8080 :::* LISTEN 24209/tnslsnr
tcp6 0 0 :::1521 :::* LISTEN 24209/tnslsnr
tcp6 0 0 :::22 :::* LISTEN 2176/sshd
tcp6 0 0 :::39959 :::* LISTEN 24747/xe_d000_XE
tcp6 0 0 ::1:25 :::* LISTEN 1230/master
[root@ip-250 bin]#

But I’ve tried to connect remote:

[root@trd-sam-01 ~]# tnsping ip-250.trendkft.hu

TNS Ping Utility for Linux: Version 11.2.0.2.0 – Production on 16-FEBR. -2018 09:52:53

Copyright (c) 1997, 2011, Oracle. All rights reserved.

Used parameter files:

Used HOSTNAME adapter to resolve the alias
Attempting to contact (DESCRIPTION=(CONNECT_DATA=(SERVICE_NAME=))(ADDRESS=(PROTOCOL=TCP)(HOST=192.168.1.250)(PORT=1521)))
TNS-12543: TNS:destination host unreachable
[root@trd-sam-01 ~]#

What is the problem?

Thanks for answer,

Jozsef.

    shara · June 5, 2018 at 22:52

    Have you check the Selinux configuration?

    Felipe Marschall · December 5, 2018 at 21:20

    firewall-cmd –zone=public –add-port=1521 –permanent
    sudo firewall-cmd –reload
    sudo firewall-cmd –zone=public –list-all

Veljko · April 22, 2019 at 15:41

Thanks a lot!! Very clear instructions.

Leave a Reply to shara Cancel reply

Avatar placeholder

Your email address will not be published. Required fields are marked *

This site uses Akismet to reduce spam. Learn how your comment data is processed.