Setup OpenVPN troubleshooting
While setting up OpenVPN I came accross some common errors or workarounds that make life easier. To make it easier to remember these I have documented them in this blog. Maybe they are useful for others as well.
Remove pass phrase
In case you want to remove the pass phrase from the server key to make it easiert to start the OpenVPN server part, use the following command:
mv server.key server.key.orig
openssl rsa -in server.key.orig -out server.key
You’ll have to enter one more time the pass phrase of the key, and then a new server.key file is written without the pass phrase. You can see this when looking into the key files.
With pass phrase:

Note: file starts with: BEGIN ENCRYPTED PRIVATE KEY
Without pass phrase:

Note: file starts with: BEGIN RSA PRIVATE KEY
Run OpenVPN as a service on Linux
After installing openvpn via yum on AWS AMI Linux, a service script is also installed. How the file works and can be activated is written in the file itself:
more /etc/init.d/openvpn
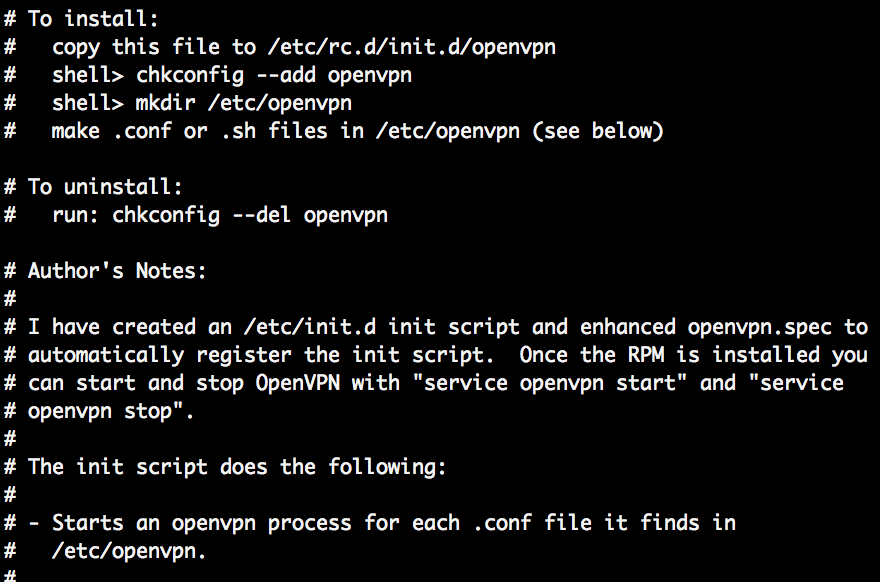
The file should already be copied by yum to /etc/rc.d/init.d/openvpn
Activate the service
chkconfig
Check whether or not openvpn is already configured to run as a service. For each run level, the status is either on or off. In case of on, openvpn is already configured to run as a service. In this example, opevpn is not configured to run as a service in any runlevel.
sudo chkconfig --add openvpn
![]()
sudo chkconfig openvpn on
![]()
OpenVPN will now be started as a service in the run levels 2, 3, 4 and 5. Output of openvpn is then written to /var/log/messages
sudo tail -f /var/log/messages

Systemd
To start and control openvpn via systemd. Check status of openvpn.
sudo systemctl status openvpn

Edit service configuration
sudo vim /etc/default/openvpn
Insert the client configuration to start automatically. Here, I am going to start client1.conf:
AUTOSTART=”client1”

Start service
sudo systemctl start openvpn
sudo systemctl status openvpn

Solving common OpenVPN connection error message
Some information on how to solve common OpenVPN error message on the server and client. Most occur when trying to start OpenVPN for the first time.
TA.KEY
Client starts connecting but no connection is established.
Error message
TLS Error: cannot locate HMAC in incoming packet from [AF_INET]
Cause
Server is configured to use ta.key.
Solution
Copy the ta.key into the openvpn configuration directory and specify its location in the conf file.
Cipher final failed
OpenVPN server accepts a client connection, but communication fails.
Error message
Authenticate/Decrypt packet error: cipher final failed
Cause
Server and client are using different algorithms for encryption and decryption. On the server, the log gives more information:
WARNING: 'cipher' is used inconsistently, local='cipher AES-256-CBC', remote='cipher BF-CBC'
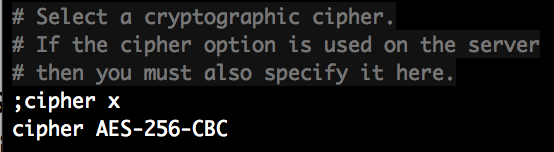
Solution
Server uses AES-256-CBC, while the client is using BF-CBC. Adjust the client configuration in client.conf. Insert cipher AES-256-CBC in client.conf
Other parameters to adjust
During first startup, some warning message may be written on the server log. Most common they refer to link-mtu, cipher, keysize or comp-lzo.
WARNING: 'link-mtu' is used inconsistently, local='link-mtu 1557', remote='link-mtu 1542'
WARNING: 'keysize' is used inconsistently, local='keysize 256', remote='keysize 128'
WARNING: 'comp-lzo' is present in remote config but missing in local config, remote='comp-lzo'
Solution
Adjust the parameters in the client.conf file so that they match the server configuration. Also good to check this way if a not controlled/configured client is connecting to your server.
Link-mtu
Configure the client to use the same mtu size as the server. Insert parameter link-mtu into client.conf.
link-mtu 1557
Keysize
Keysize used by client and server should be the same. Insert parameter keysize into client.conf.
keysize 256
Comp-lzo
Uncomment the parameter in server.conf.

0 Comments