Visual regression testing
Visual regression testing checks if the UI was affected by a change. It allows to identify changes that affect the visual representation of the app. These kinds of changes have a huge impact on the perception of the app to the end user. Worse: these errors might not be detected using traditional developer tests like unit or integration tests. In case the theme or a library update change how an icon looks like, the page layout or button placement is differently, this is identified by visual regression testing. Changes that can affect the UI do not need to be introduced by the developer or must be code changes. These changes have a huge impact on how the app is perceived by the end users. Such a change might mandate a documentation or training material update.
Visual regression tests allow for testing productive app if it is working. Or better: still looks as expected. They act like smoke tests. When the app shows the data as expected, assume that the app works. To know if the app still looks like as expected, a baseline of the UI is taken as reference. If a screen or the app has reached a certain stability, the current UI is taken as a snapshot / image. The app is then validated against these images that form the baseline. If changes are detected, the test fails. Adding the baseline images to a source code management system like git allows to keep a record of the UI evolution of the app. And answers the question: this was not there yesterday. While visual regression testing should be used for productive apps, it can also be used already during development.
Tooling
Visual regression testing is an established approach. There are many test frameworks and providers that offer it as part of their portfolio. WebdriverIO offers it. BrowserStack via Percy. Argos is an open source visual testing platform. Of course, SauceLabs has it too. This was a high-level introduction to the topic. Let’s show how visual regression testing works using an example.
Example
For the demo / example I’ll show here, I am using BackstopJS. It runs easily locally, and the installation is done via npm. No special setup or registration is needed, and it is perfect for getting into visual testing.
For the demonstration I am using two apps: the app that is going to be tested, and the actual testing app.
- Example app: The app that used for the CAP SFlight demo app from SAP.
- Testing app: The app for the visual regression tests is available at GitHub.
Prerequisite: setup example app
The CAP SFlight app serves in the example scenario as the developed app under test. It is a Fiori Elements app with a CAP Node.JS backend and comes with some data.
Get the app from GitHub and run it. The documentation contains all the information needed to run the app. The app comes with ootb authentication which is not needed for this example and must be disabled. The short version:
git clone https://github.com/SAP-samples/cap-sflight
cd cap-sflight
npm ci
Disabling authentication:
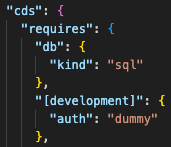
Edit package.json. Replace cds.requires.development.auth with:
"[development]": {
  "auth": "dummy"
}
Run the app.
cds watch
Access the app in your web browser:
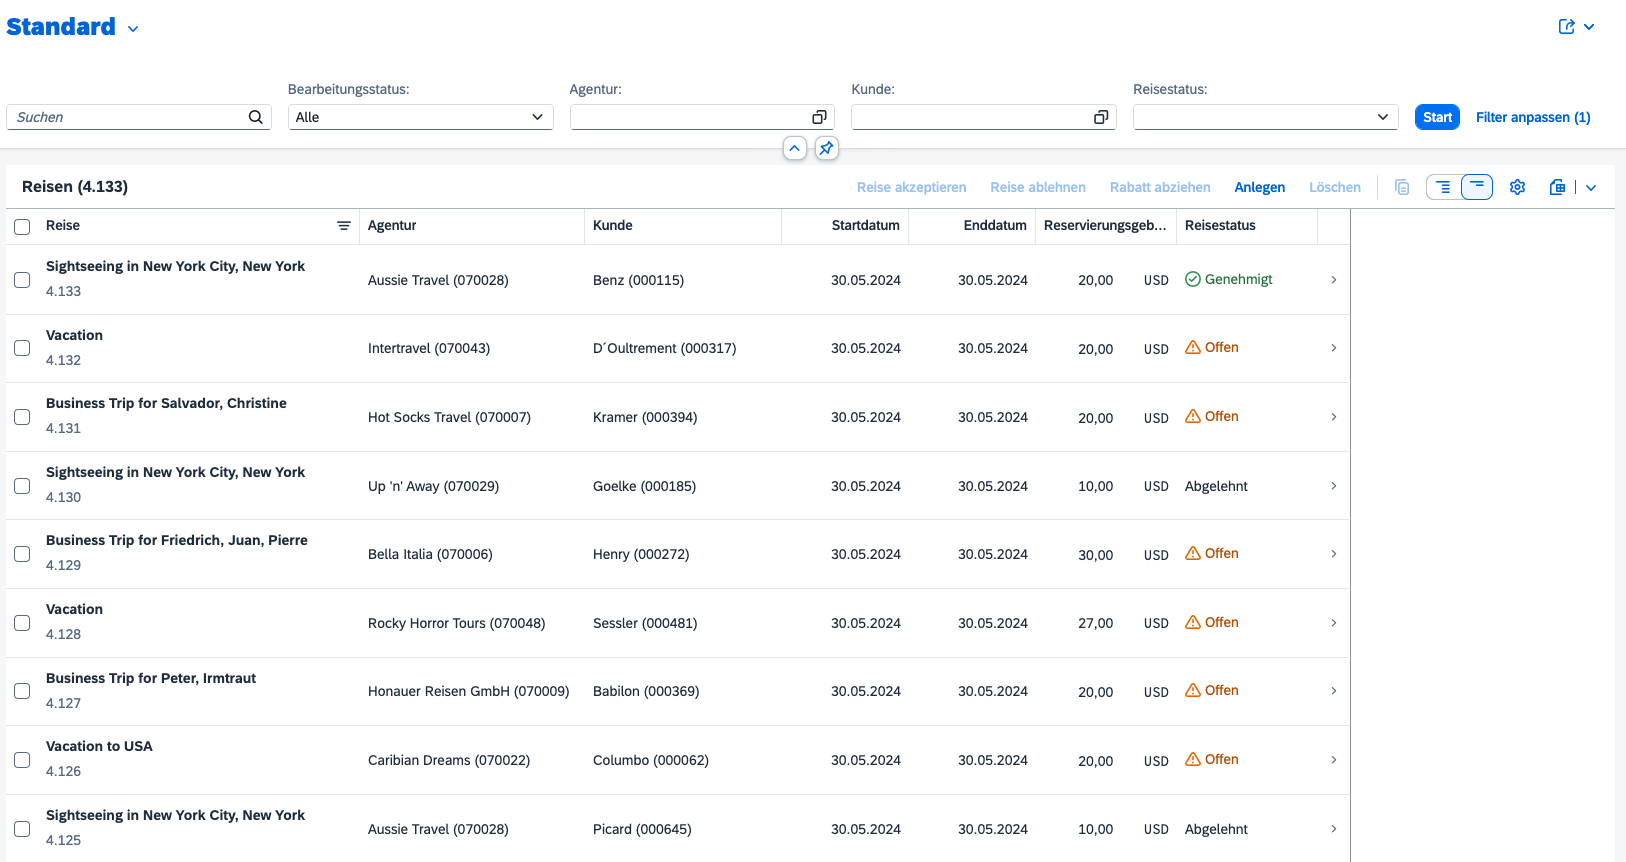
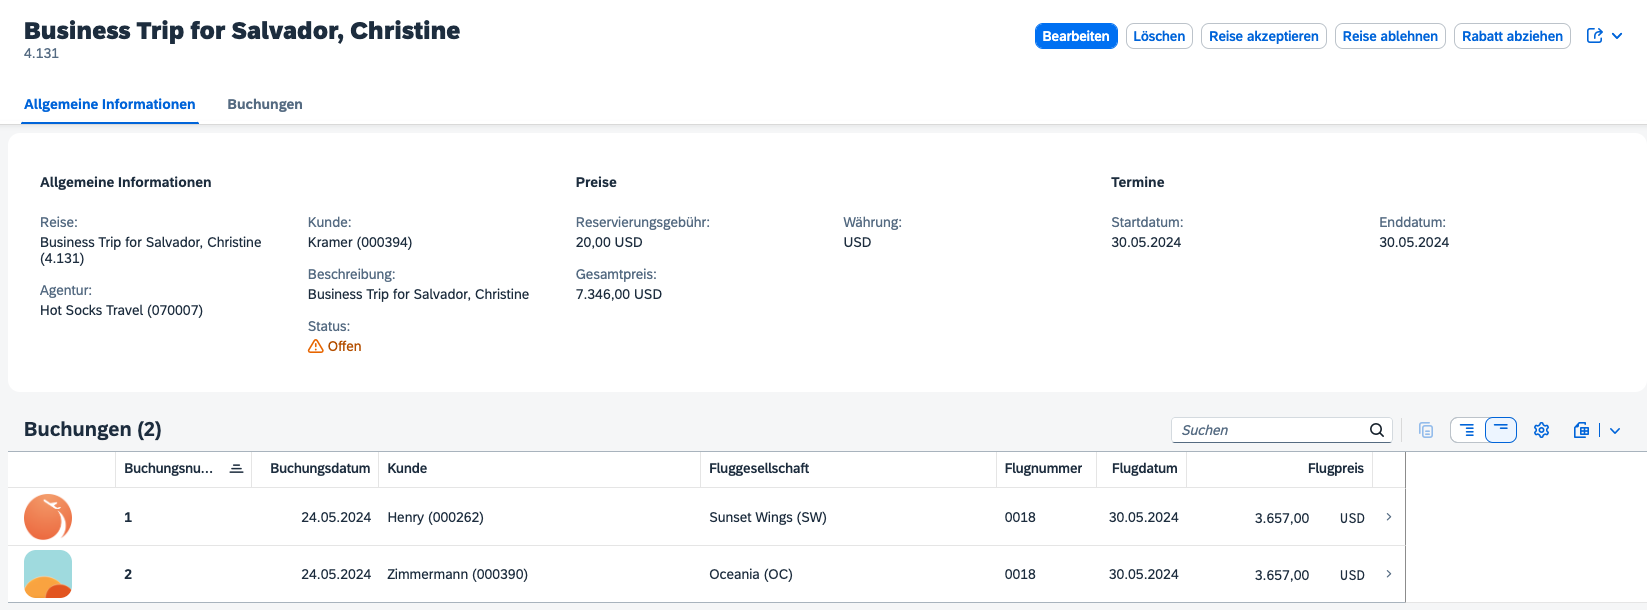
This is the app that will be tested. The Fiori Elements app supports accessing entities directly. These features will be tested by the visual testing app.

Visual Testing App
The testing app used can be downloaded from GitHub. The repository comes with several branches, each representing a configuration step of the testing app. The main branch is the documentation.
Branches
- 1-init-project
- 2-UI-tests-configuration
- 3-create-baseline
- 4-run-first-test
- 5-failed-test
Step 1: BackstopJS setup
BackstopJS can be installed globally, or locally. In the sample testing app, it is added locally.
npm i –save-dev backstopjs
To setup a BackstopJS project, run
npx backstop init
This will install the BackstopJS specific files in the project. The folder backstop_data is used to store test data and contains helper scripts for running the tests. BackstopJS supports Puppeteer and playwright, and for both it comes with helper scripts. The file where the tests are specified is backstop.json. It is a JSON file that configures Backstop and contains all testing scenarios. Out of the box, a test against the BackstopJS website is included. Configuration for paths, engine, limits or debug are all in the backstop JSON file.
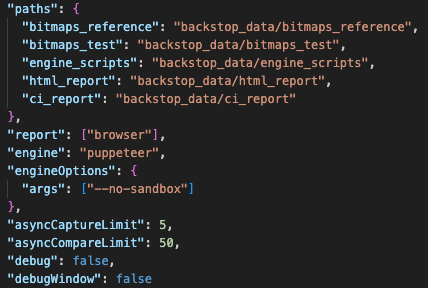
This is the status of the project in branch 1-init-project.
Step 2: Test scenario configuration
After initializing the BackstopJS project the first UI tests can be added. The current configuration after project initialization is to test for tablet and phone resolutions. These are defined in the viewports property of the backstop config file. The values can be freely chosen.
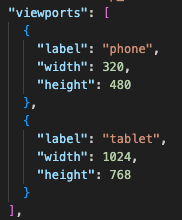
The sample testing app will only test for a desktop client. Replace the values of the viewports array with:
"viewports": [
  {
    "label": "desktop",
    "width": 1280,
    "height": 1024
  }
],
Tests are defined in the JSON file backstop in the array scenarios. The Fiori Elements app being tested allows to directly access entities. These pages are going to be tested:

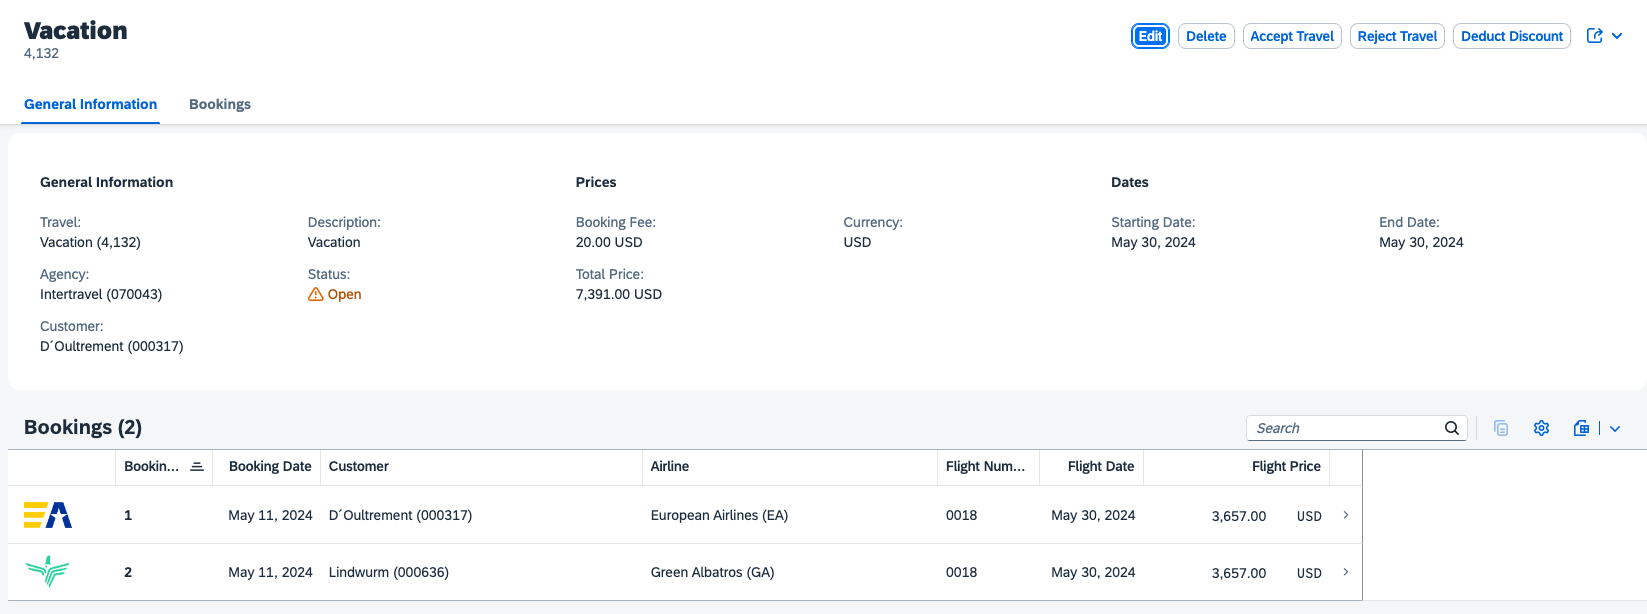

Adding these to the scenarios will add 3 test cases.
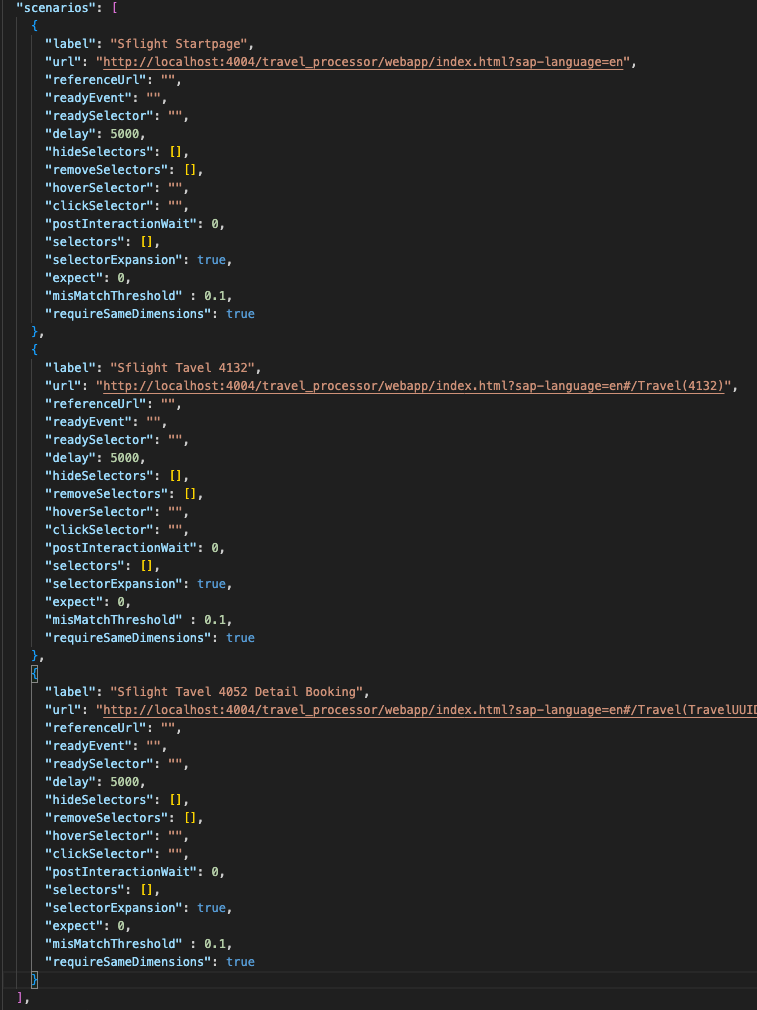
This is the status of the project after checking out branch 2-UI-tests-configuration.
Step 3: Create baseline
The BackstopJS flow for testing is:
- Create baseline. This is done by running a test and accepting the results as the new baseline.
- Run additional tests and validate them against the current baseline.
Before running BackstopJS, make sure that the app under test is running and accessible!
To create a new baseline, run
npx backstop test
This will run the tests and capture the images. Of course, the test result will fail. This is normal for the first test. This is caused as there are no images that can be used for the comparison.
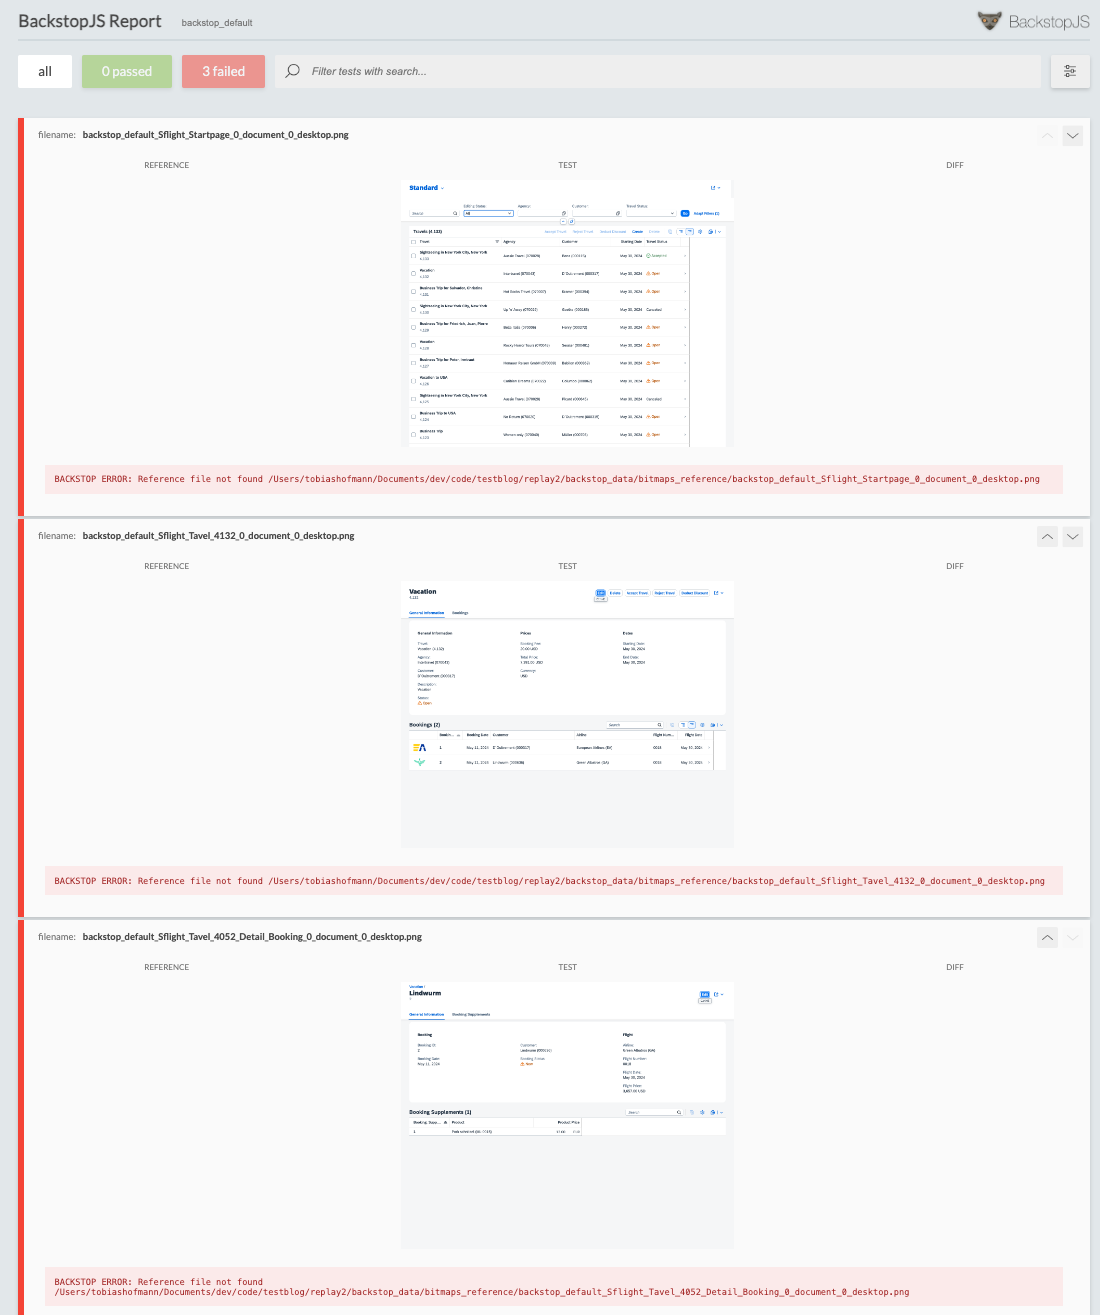
Note: Validate the images. The information they show must match your expectations. If an image shows an error, like no or missing content, error message, run the test again or check if the app is working as expected. These images are going to be used as the new reference for validating the app.
To use the newly captured images as baseline, run
npx backstop approve
This adds the images to the baseline. They are stored as normal images in the bitmaps_reference directory (as given in the backstop configuration) and should be added to the git repository.

The images can be accessed and opened by any tool that supports png.
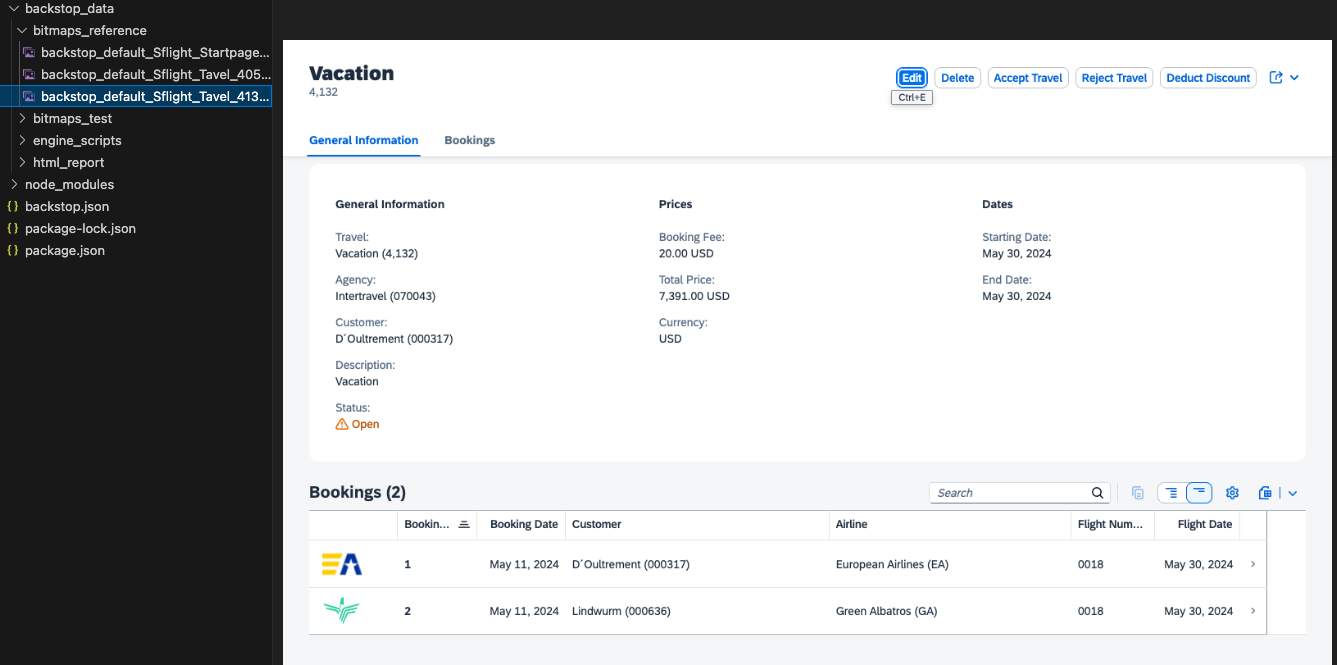
This is the status of app in branch 3-create-baseline.
Step 4: Run visual tests
With the test project configured and the baseline defined, everything is ready to run the tests.
npx backstop test

After the images of the test run are captured, they get stored in the project and a comparison against the baseline images is done. The result of this analysis is then shown in the browser. If everything works, no failed tests are reported. All three tests passed and the result is shown.
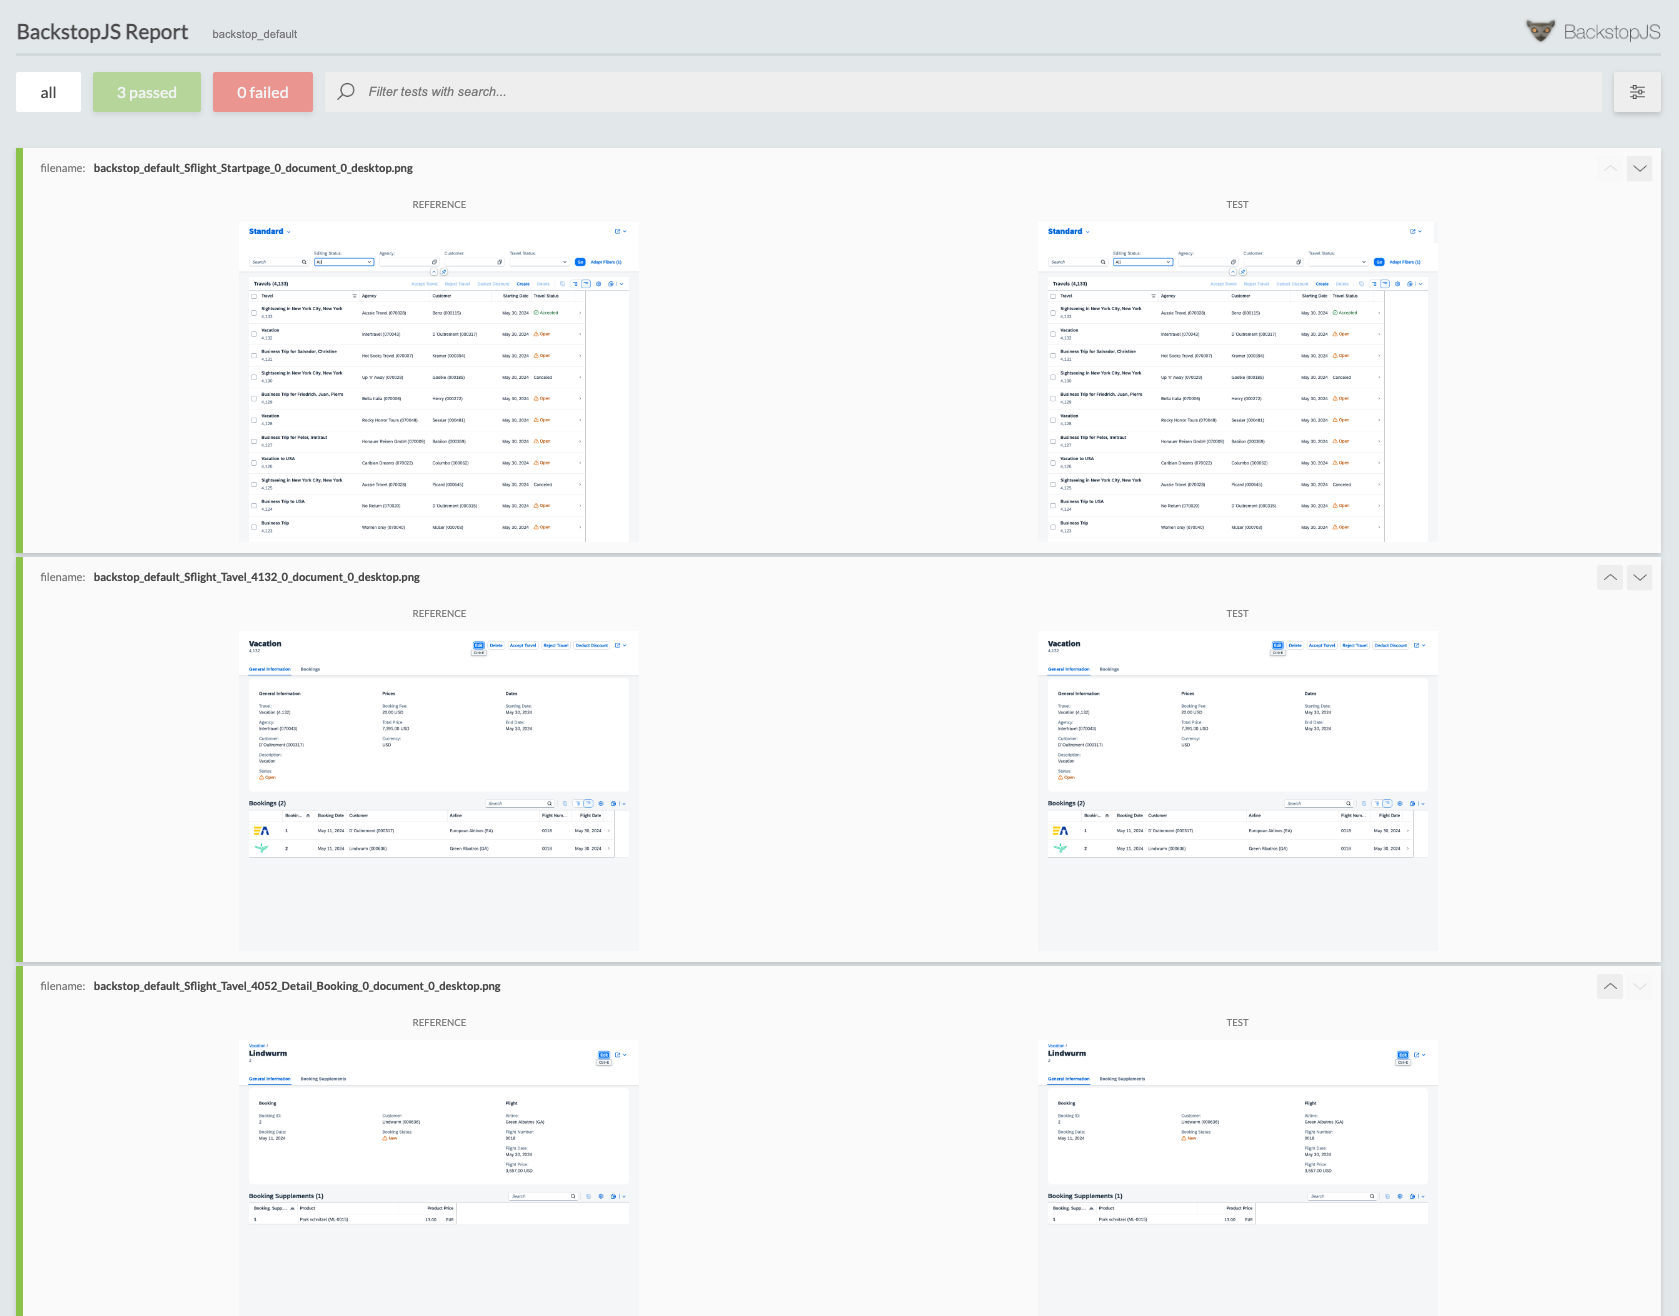
The results of each test run are stored also in the backstop_data directory. This allows to check for each test run the captured images. The report can be accessed manually by opening the file /backstop_data/html_report/index.html in the browser.
This is the status of the app in branch 4-run-first-test.
Failing a regression test
In case the captured image of the app during a test run differs from the baseline, BackstopJS will report this. To simulate an UI change, let’s change the app under test. Move the agency column in the main table after the customer column. This is done in the project cap-flight. The CDS file app/travel_processor/layouts.cds must be changed.
This is how the columns are arranged by default. First agency, then customer.
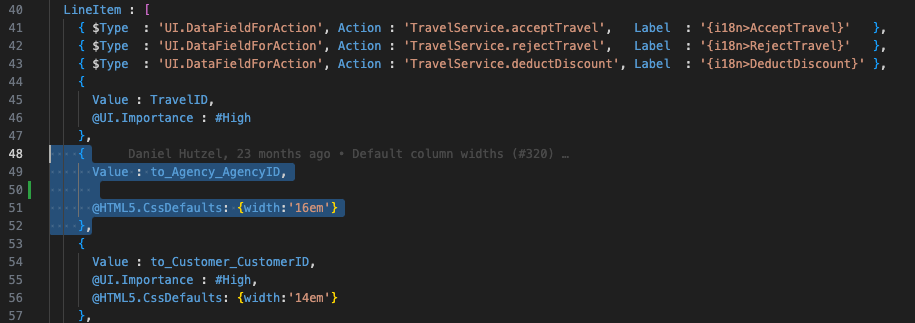

Move the property for Agency after Customer:
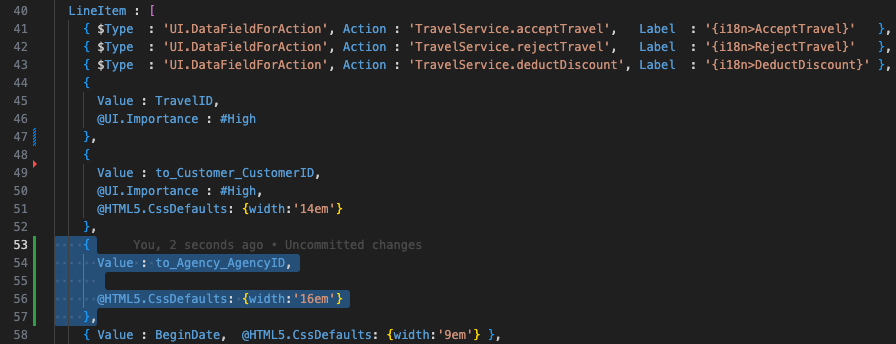
Start the app via cds watch. Result:

Run the visual test to get a failed test result.
npx backstop test
Result: The test will fail.
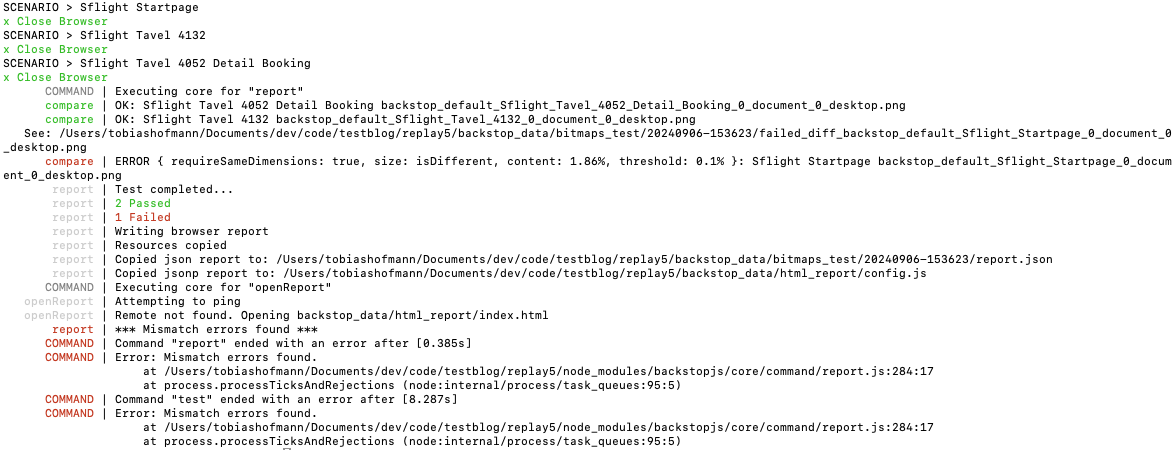
The test result report shows that the first test failed.
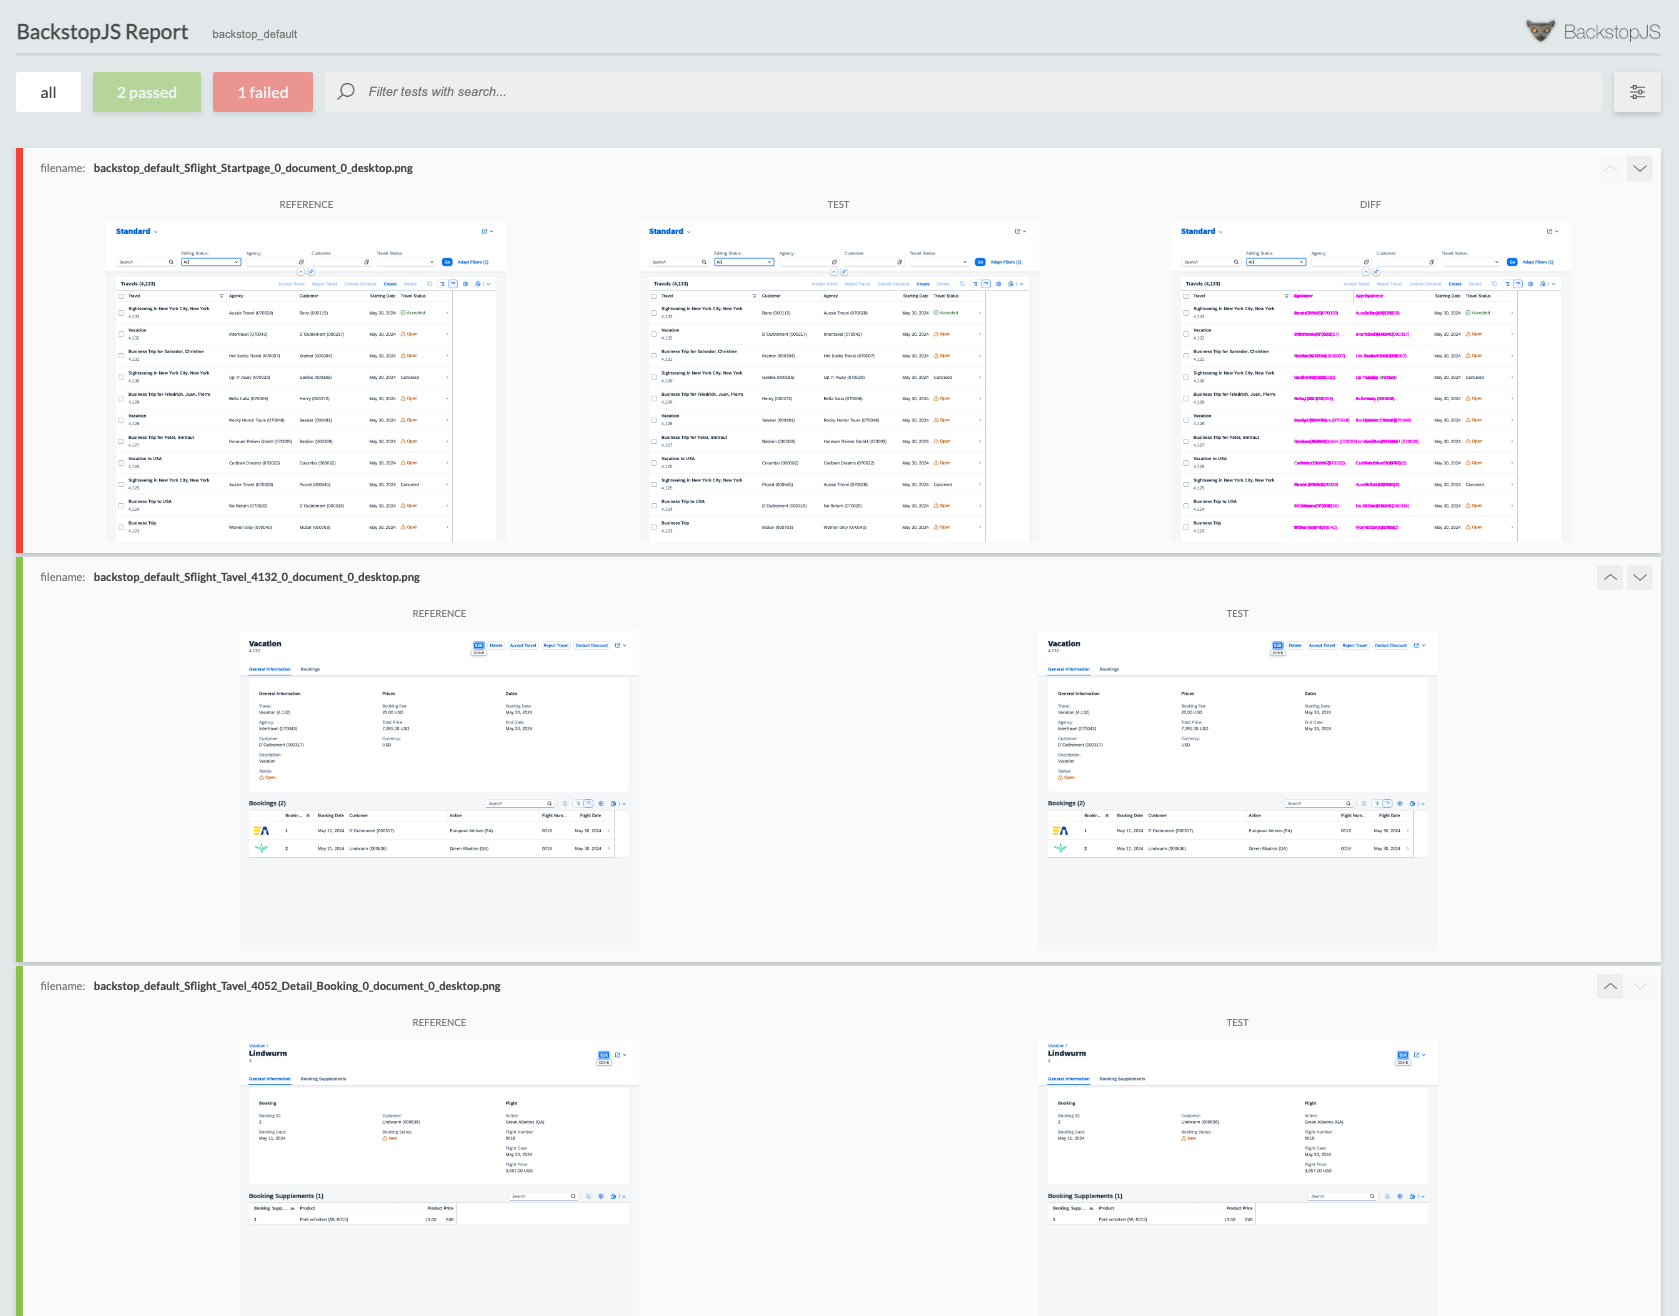
The change of the column positioning causes the error. The test report can be filtered to show only failed tests.

A nice feature is that BackstopJS highlights the UI areas where the mismatch was found.
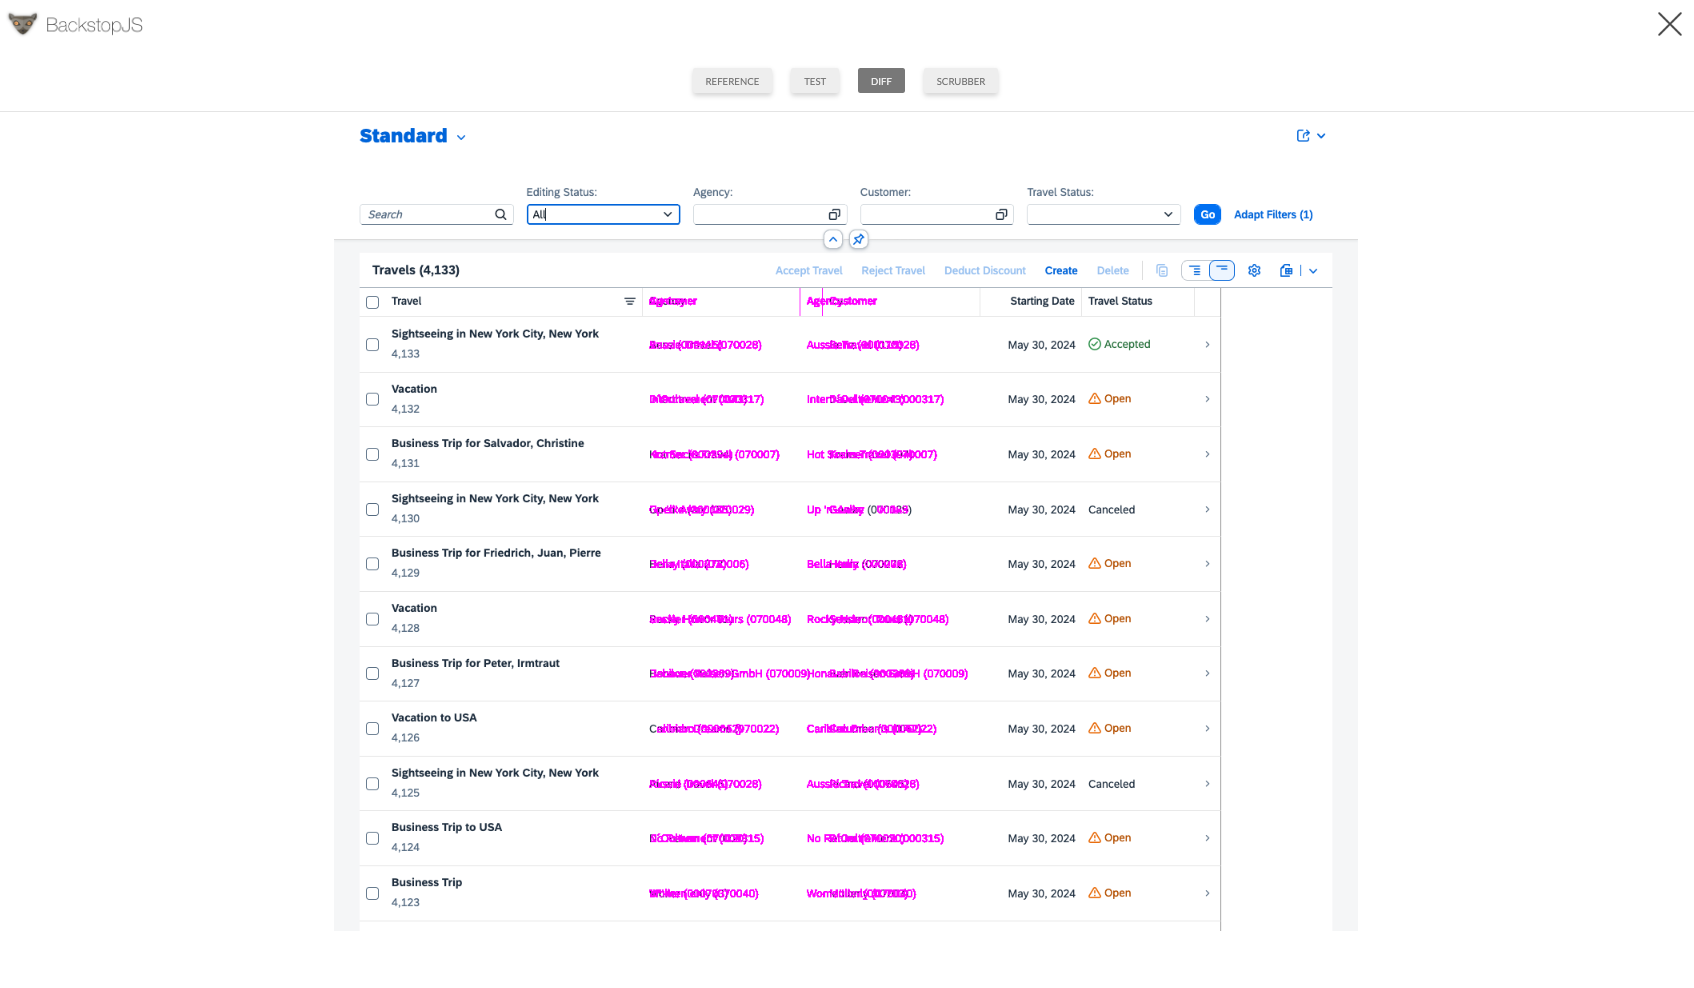
This is the status of the app in branch 5-failed-test.
Conclusion
The visual regression testing can help in finding UI changes that affect how the end user is perceiving the app. The test results are easy to understand, thanks to the visual display of the report. Creating the tests is easy, as no coding is required for capturing pages that can be accessed via a link. Working with key/end users on the tests is almost no work, as the test creation process does not require coding. The visual regression tests however need an app to test. They perform best when the app under test is at least available in the QA environment. The best outcome and benefit are to run them in production, to proactively find changes. Thanks to high-fidelity designs, visual tests can already be used during development: tests fail until the app or UI control matches the defined screen.
0 Comments