Controlling Android network state with jMeter
Note: this blog is also published at SAP Community Network: http://scn.sap.com/community/mobile/blog/2014/10/13/controlling-android-network-state-with-jmeter
Testing a mobile web scenario includes testing the app end to end for different usage scenarios. This includes testing the state of the mobile device: online and offline. Consider the following scenarios: a HTTP POST request is send to SMP 3 which in turn will send out a push notification, or the UI5 app opens a HTTP request while the device is offline. Will the test pass as expected?
The Android emulator allows controlling the state of network connectivity by pressing F8. This turns gsm data on or off. Manually turning the data network on or off is possible while executing a test, but does not really reflect a real scenario where this happens randomly (entering elevator, subway, bad connection, etc) and is out of your control. To simulate a suddenly not available data connection means to be able to randomly deactivate and activate a data connection on the emulator.
First thing of course is to know how to turn off network in an automated way. To control the network state of the Android emulator, the command: gsm data off/on needs to be issued. To execute the command it is necessary to connect via telnet to the emulator.
Command: telnet localhost 5554

Note: 5554 is the number of the emulator. Connecting via adb shell won’t work.
 Telnet opens the command shell and allows executing gsm command to turn off or on the network.


In case you followed some of my other blogs about testing, you`ll have noticed that I use jMeter. JMeter comes with an impressive list of functionality allowing you to cover almost everything in your test scenario. Therefore, my first thought was to use jMeter to control the network state of the Android emulator. This way, I can include this behavior in other test cases executed by jMeter.
While the commands and execution order is now known, a problem last: Windows telnet client cannot read a list of commands form command line and there is no jMeter telnet client plugin. There is no easy way to send the commands from jMeter to Android. These are two problems to solve:
- Send scripted telnet commands
- Execute these from jMeter
Send scripted telnet commands
Let’s solve problem 1: One possibility is to use a VB script to send the commands by emulating keyboard strikes. This implies that you should not use the keyboard at the same time – and writing a VBscript. And it does not solve the problem that depending on your Windows version you first will have to install telnet or even won`t be allowed doing so. The solution is a tool known in the Linux world, a tool created in a time WWW was only in its infancy and known only to a few: nc. The last released stable version of nc was released 10 years ago. Fortunately, there is a newer (better) implementation available from nmap: ncat. Ncat is included in the nmap download and available therefore for Windows. No compilation needed, just download and run ncat.exe. To open a telnet session to Android with ncat, the command is: ncat -4 –t localhost 5554

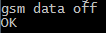
The commands to deactivate gsm data are:
gsm data off
quit
Save these to a input file (e.g. gms_off.txt) and let ncat read the file. Command: ncat -4 –t localhost 5554 < gsm_off.txt

This solves issue #1. Now telnet can be used to send a list of commands to Android. Next is to solve issue #2 so jMeter can execute the ncat command.
Execute ncat from jMeter
jMeter offers a OS Process sampler that allows executing a command line program. I wasn`t able to start ncat.exe directly; starting CMD and pass ncat as a parameter however works.
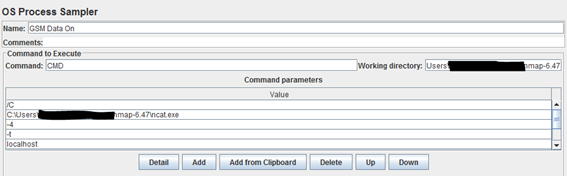

The command to be run is CMD and the input parameters are:
/C <path to nmap>\ncat.exe -4 –t localhost 5554 < <path>\gms_off.txt
Including another sampler for turning data connectivity on again lets jMeter control the network state. Adding a timer element adds the random part to the test. Of course the procedure outlined here is not not applicable to network data, but to all commands available by the Android command shell.
0 Comments