Interactive visual regression tests
UI tests can be recorded by end users using tools like the Chrome recorder. These tests can be shared and be used as the starting point for further tests. The vantage of such a user recorded and provided test is that they were recorded by the user and include the actions taken by the user to perform a task. A developer does not need to translate a user provided test description. The provided recording can be used directly as input for further tests.
In the example discussed in this blog post, a recorded tests is used as the base of visual regression tests. The goal of this article is to show how to take the information from a Chrome recorded test and reuse it in a BackstopJS test.
In the test recording, a user is applying two filters in the SAP SFLIGHT app. A travel agency is selected from the value help dialog, as well as the travel status. The table is filtered by applying both values. Using the test recording, a visual regression app is created from scratch and test cases are added. After completing all 5 steps, a visual regression test app that validates the value helps and the result table is created. The tests are created by configuring the visual regression test tool BackstopJS. For taking over the information from the test recording and transform it into a test no coding is required.
Prerequisite
The app under test is the SAP CAP SFLIGHT app. The app can be obtained from GitHub. Make sure to disable the built-in authentication. The app must be started and be accessible when running the testing app. The testing app developed throughout this article is available in my GitHub repository.
Step 1: Initialize project
Create a new npm project, add BackstopJS to it and initialize BackstopJS.
npm init
npm i –save-dev backstopjs
npx backstop init
This is the status after checking out branch 1-initialize-project
Step 2: Add tests to access homepage and open value help
Access app page
The first test to add is to access the start page of the app. In the Chrome recording, this is the first step run: navigating to the page to be tested.

Use the user provided URL as input for the first visual regression test.
{
  "label": "Sflight Startpage",
  "url": "http://localhost:4004/travel_processor/webapp/index.html?sap-language=en",
  …
}
Open value help
The second test is to open the value help of the agency input field. This is already the difference between the original visual regression test. There only the pages of the app were accessed directly. No interaction happened. To test the correct visualization of a value help dialog, an interaction with the UI must be performed. That’s where the UI recording excels. An interaction is recorded and can be re-used in the BackstopJS tests. The value help of the agency input field is going to be tested.
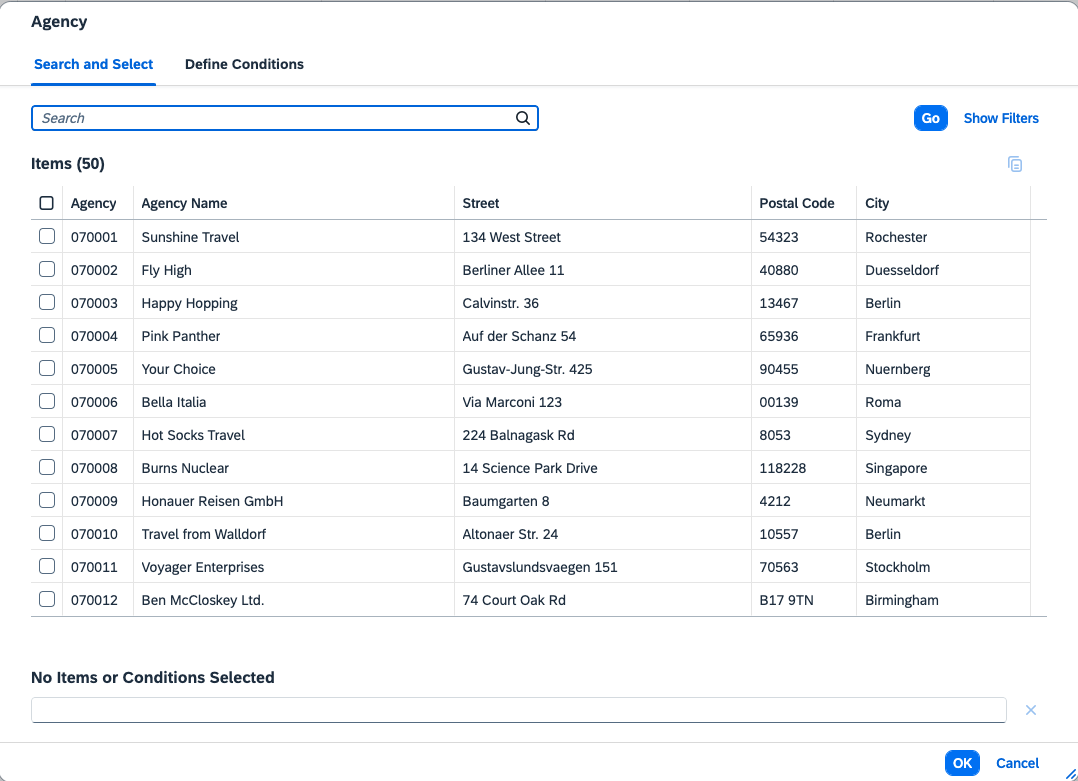
To open the value help, an action on the input field is needed. This is done by clicking on the value help icon on the right side.

This action is part of the recorded UI test SFLIGHT 1.json. It is of type click and contains 3 selectors.

The recorded UI test checks for a series of locators. The first one is the ID locator. # is used to reference a HTML id attribute. The text identifies this element in the HTML document.
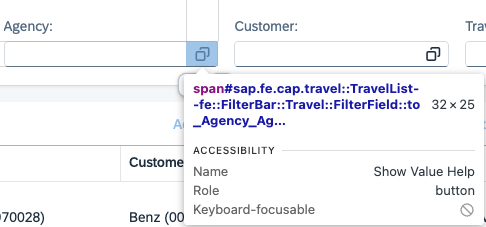

In the HTML code the ID of the value help is shown as: sap.fe.cap.travel::TravelList–fe::FilterBar::Travel::FilterField::to_Agency_AgencyID-inner-vhi
This matches the value from the test Chrome recording. The only difference is that the ID in the Chrome recording escapes the : to \\:. But that is not a problem. The value from the Chrome recording can be used as-is in the BackstopJS test scenario configuration.
{
  "label": "VH Agency",
  "url": "http://localhost:4004/travel_processor/webapp/index.html?sap-language=en",
  "clickSelectors":[
    "#sap\\.fe\\.cap\\.travel\\:\\:TravelList--fe\\:\\:FilterBar\\:\\:Travel\\:\\:FilterField\\:\\:to_Agency_AgencyID-inner-vhi"
  ],
  …
}
Run the tests to capture the first test results and to use them as the baseline.
npm test
npx backstop approve
This is the status of the project after checking out branch 2-agency-vh-tests.
Step 3: Run UI tests
After creating the test scenario using the input of the Chrome recording, next step is to run them.
npm test
Result
The test result report will open: backstop_data/html_report/index.html
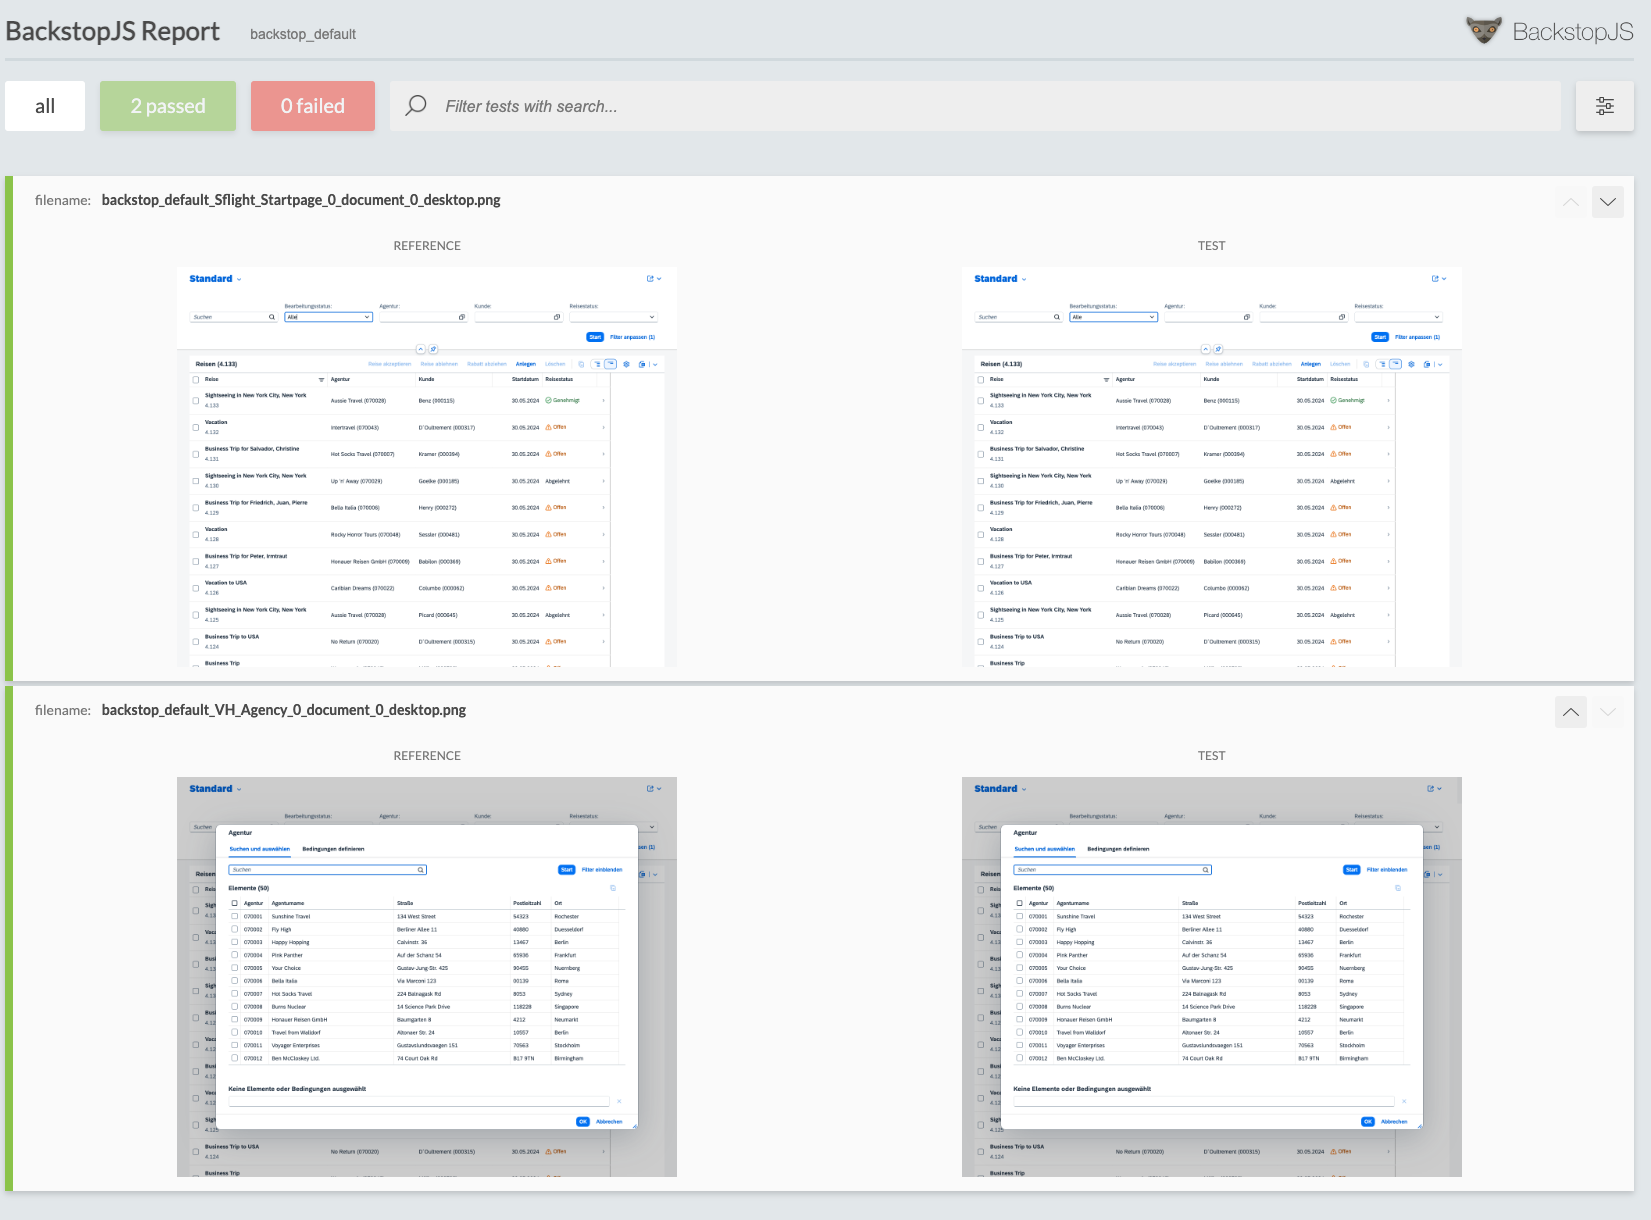
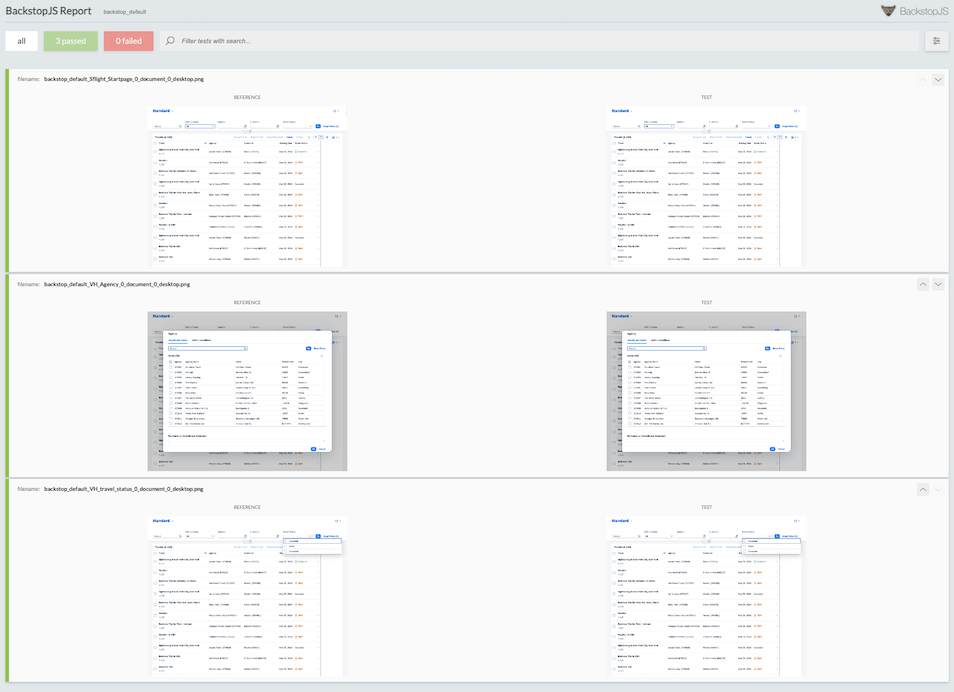
Running the tests executes the same tests as in step 2 again. The test will report no error, as the app wasn’t changed between test runs. The important part of step 3 is very simple: a test is configured taking the direct input of a user recorded test. It is not the developer that took the ID needed to trigger the agency input field value help. This ID was provided by the provided test recording. The ID was only taken as input for the visual regression test by the developer.
This is the state of the project after checking out branch: 3–run-ui-tests.
Step 4: Add test to open travel status code value help
So far, the tests are simple. The app is accessed, and an action is performed. The provided test recording however performs a search on the table using two filter values: agency and travel status.
Let’s add a third test to the test scenario. The value help for the travel status input field will be opened. This action is part of the recorded UI test:

The ID to use is #sap\\.fe\\.cap\\.travel\\:\\:TravelList–fe\\:\\:FilterBar\\:\\:Travel\\:\\:FilterField\\:\\:TravelStatus_code-inner-vhi.
{
  "label": "VH travel status",
  "url": "http://localhost:4004/travel_processor/webapp/index.html?sap-language=en",
  "clickSelectors": [
    "#sap\\.fe\\.cap\\.travel\\:\\:TravelList--fe\\:\\:FilterBar\\:\\:Travel\\:\\:FilterField\\:\\:TravelStatus_code-inner-vhi"
  ],
  …
}
Run the tests:
npm test
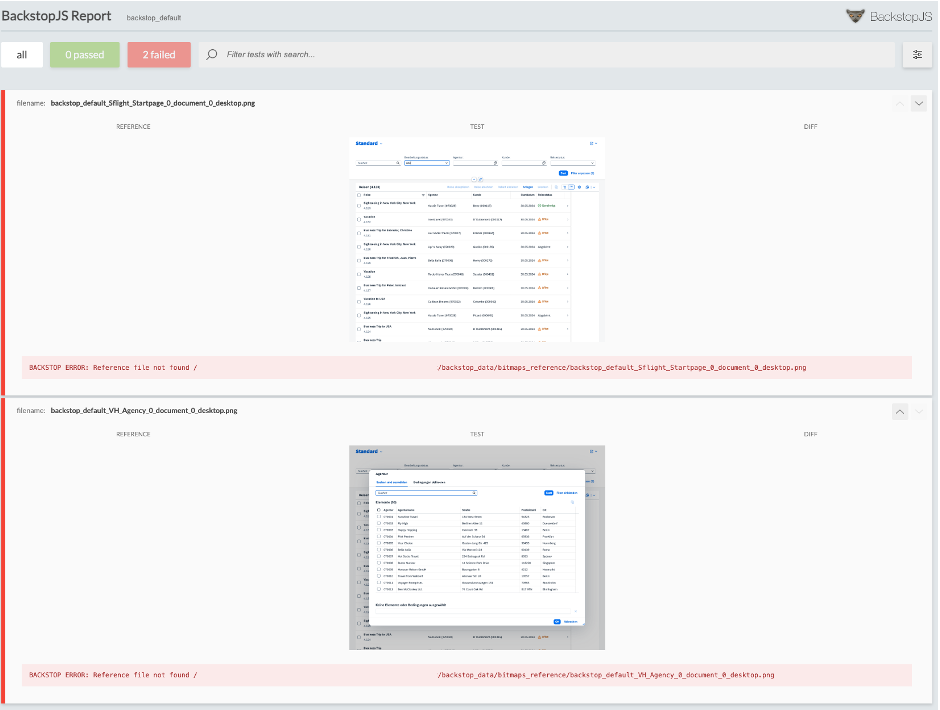
As a new test is added to the scenario list, the test run will fail. For the added test no reference is found in the baseline. This will make the new test fail.
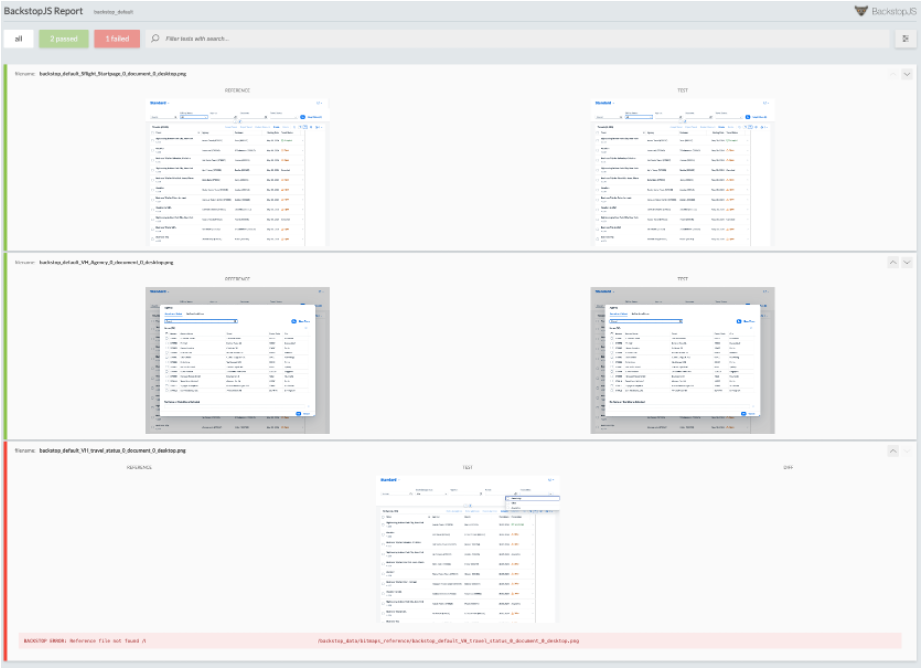
Before adding the new test results as new baseline, check that the captured test result for the new test is OK.
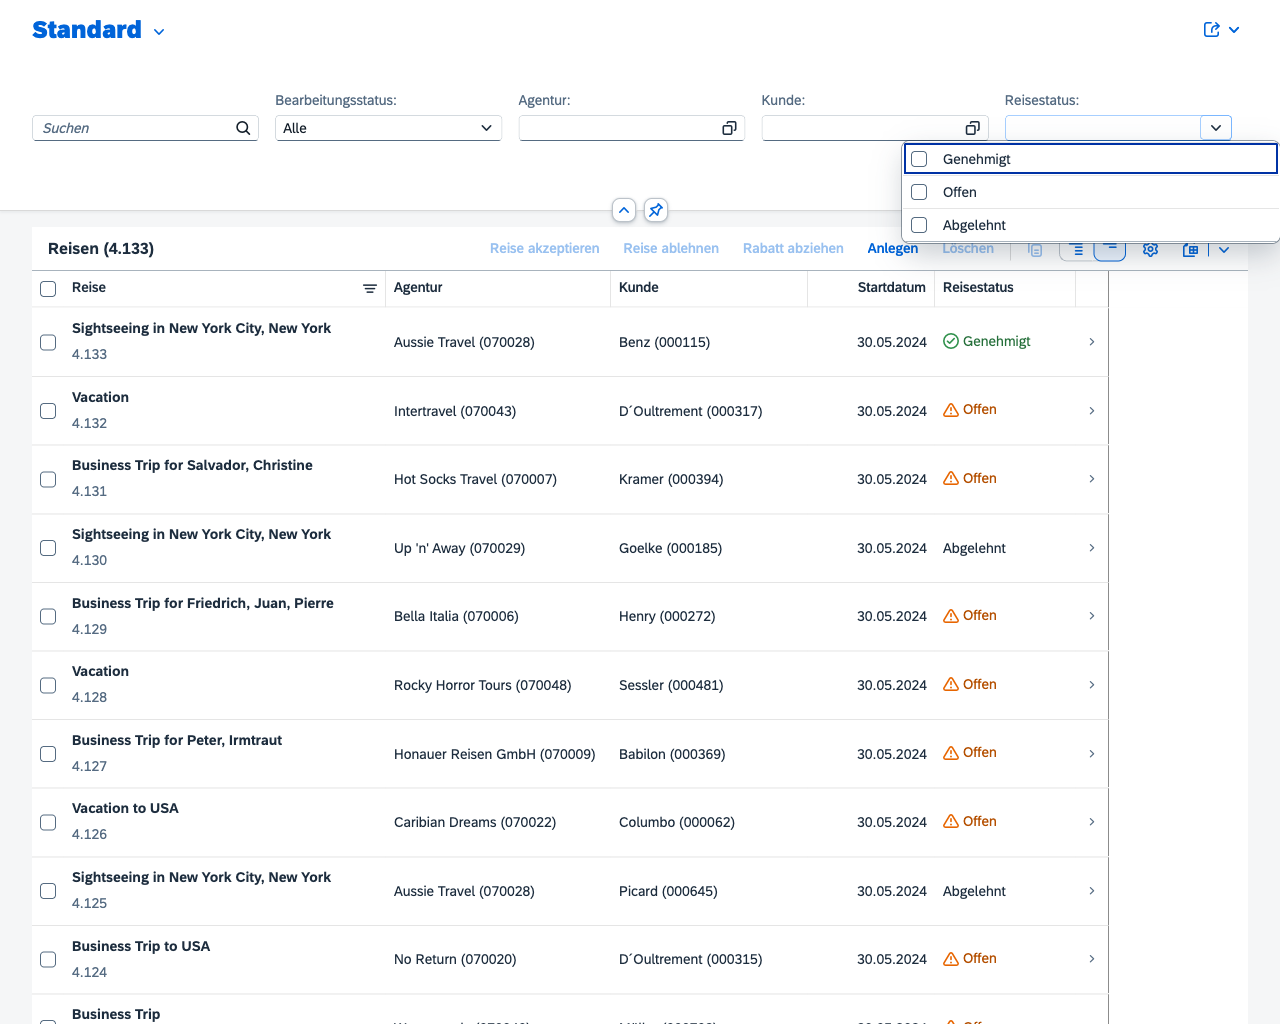
The dropdown is called and shown with three entries. This is as expected. Therefore, add the new images to the baseline.
npx backstop approve

Running the test again will now test all three test scenarios and report back that all test passed.
npm test

Result
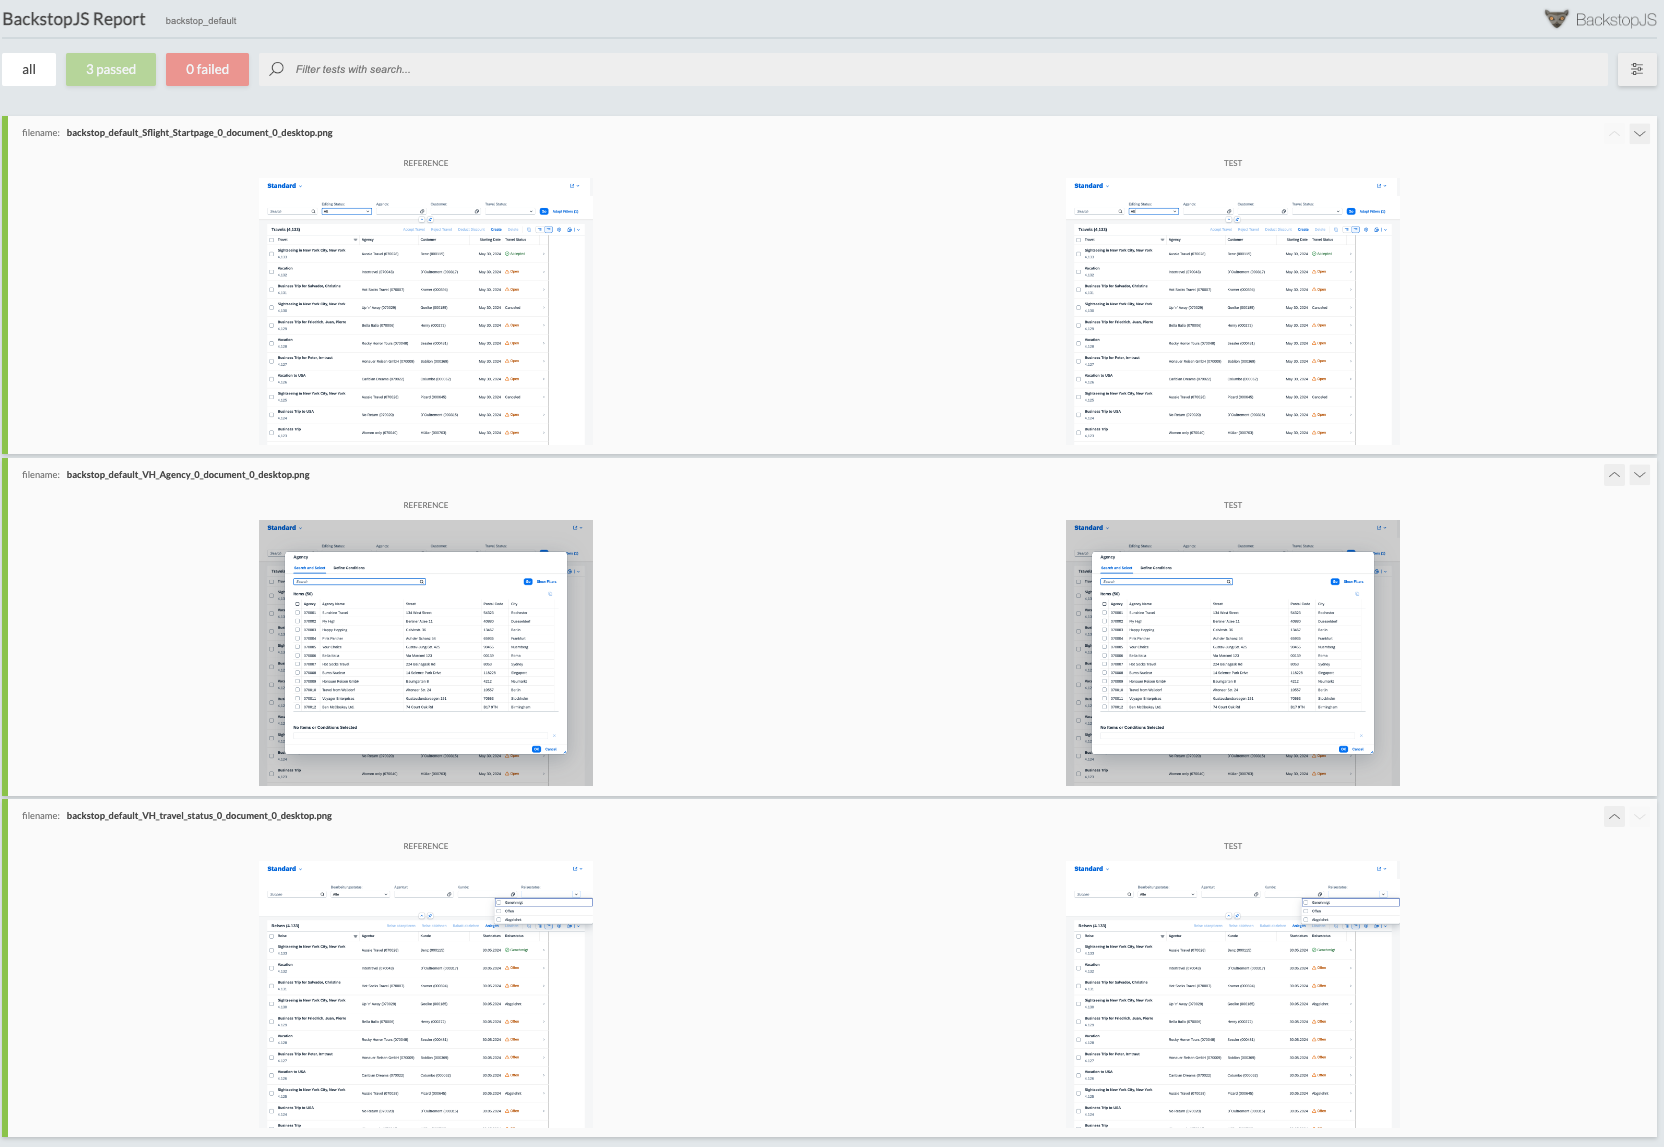
All three tests are taken directly from the user recorded and provided UI test. No coding is done so far. While the execution might be too technical for most end users, the input they provided is taken as-is and the result of the test run is an easy-to-understand report.
This is the status of the project after checking out branch 4-travel-status-vh-test.
Step 5: Trigger actions to filter table
Step 5 is where the visual testing approach reaches the limitations. To enter the filter values, a set of actions needs to be performed. Open the value helps for two filters – agency and travel status – and select a value from the dialog. Out of the box, this complex interaction is not possible using BackstopJS. While you can provide several elements to click on, those are executed directly one after the other. The click action on the agency value help might be performed first, but the click action on travel status is performed right after, making the app only show the travel status value help. The idea of BackstopJS is to capture a screen state, or to run some actions to reach the state like navigation, triggering input validation message or expanding an area. The goal is not to replay a complex user interaction flow. There are other tools for that (I’ll describe this approach in a later article in my blog).
The alternative approach is to NOT insert the value via the value help. BackstopJS supports the keyPressSelectors property. The filter values can be inserted directly in the filter input field. This implies that when the filter does only allow value selection from a dropdown (like the UI5 sample for Select), this won’t work.
BackstopJS keyPressSelectors documentation:

Example:
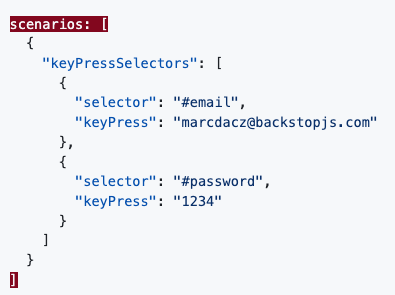
The Chrome recorder not only records clicks. User input via keyboard is also recorded. Adjusting the test recording to let the user enter the filter values via keyboard allows to reuse the test also for this scenario.
The recording for the filter agency looks like this: the input field is selected by ID, and the value of it is changed to “Sunshine Travel”.
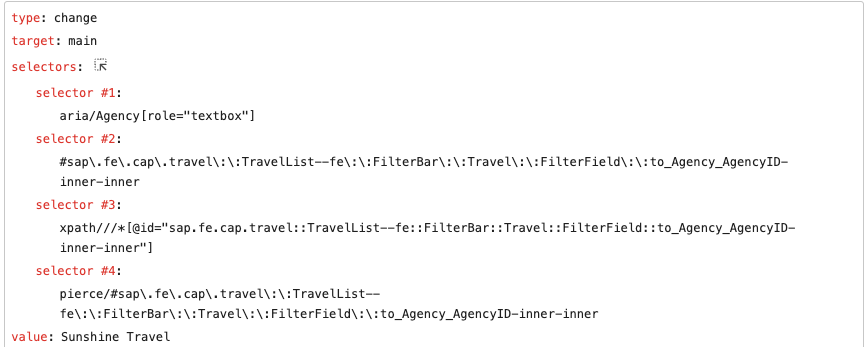
The select the filter value, enter is pressed.

The same procedure is than applied to the travel status filter field. The value entered there is “Open”.
These actions can be added to the visual regression test using copy & paste (you’ll only have to adjust the \ to \\). The test configuration in backstop.json will include the new keyPressSelectors values and the clickSelectors for triggering the search.

Nothing more needed. First fill in the filter values, then trigger the search. Directly taken from the user recorded test script. Still: no coding required.
To keep a simple test overview, you can remove the other test scenarios and only run the last test. This is done in the provided sample app. Therefore, in step 5 only one test scenario is included. Delete the folders bitmaps_reference, bitmaps_test and html_report. Create a new baseline and run the test.
npm test
npx backstop approve
npm test
Result
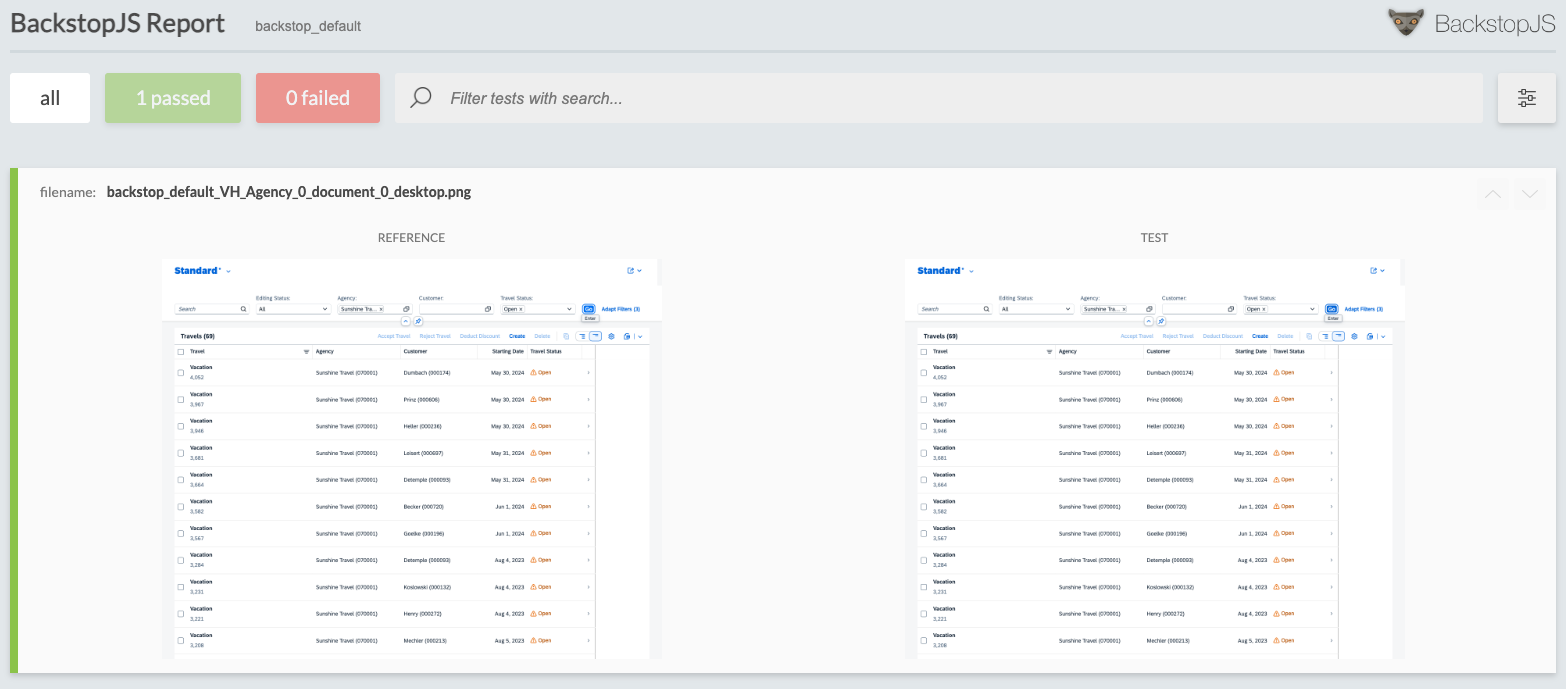
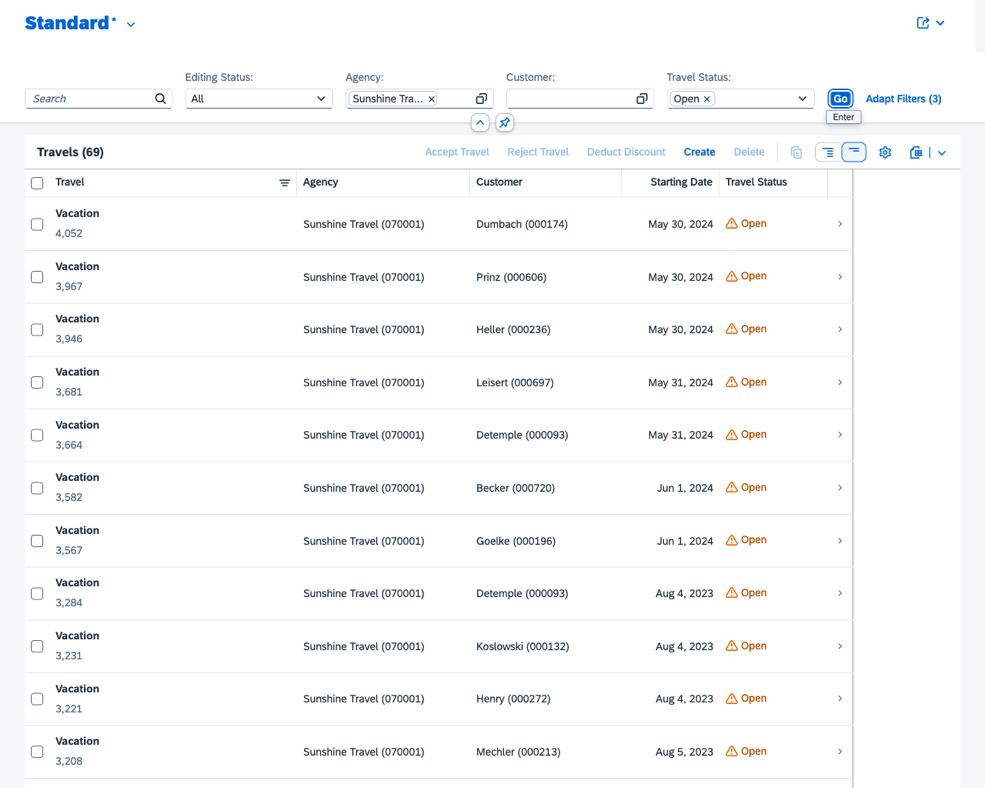
The report shows the expected result. The table is filtered for agency Sunshine Travel and travel status Open.
This is the status of the project after checking out branch 5-add-complex-test.
Conclusion
Visual regression tests can be used to test app interactions like opening a value help, input values, trigger filtering of data or navigation. Using the information from recorded UI tests, captures e.g. by the Chrome recorder, the developer does not even need to find out the needed controls or inputs. All of this can be provided by the end user via the recordings. Running these as input for the visual regression tests does not even involve coding. Basically, all that is needed is to configure a tool and filling out values via copy & paste. All the tests can be provided by end users. The task of the developer is merely to configure the visual regression tests. Again: no coding required. Adjust the tests is simple: provide a new recording and update the values. This makes it easy to adjust the tests later on when the app changes.
Visual regression tests however should not be used to test very complex user flows when many actions with the UI are needed to reach a certain app state. The sweet spot is rather to check if an UI works. Having e.g. a test for each value help, for one UI control only or for a page. Complex interactions are better tested using a different approach. What normally is the focus then is the app flow and logic. These can be also tested using the provided test recordings. One tool that allows to use the Chrome recordings as test cases is replay. This scenario will be part of my next blog post in this testing series.
0 Comments